How to configure PhenixID Authentication Services as an OAuth Authorization Server Provider (AS) - using Client Credentials Flow
Warning
Please note, this document is using the legacy authenticators - in order to use the new protocol agnostic authenticators, you need to apply relevant modifications to the configuration examples outlined in this article.
This document describes how to setup PhenixID Authentication Services as an OAuth Authorisation Server using OAuth Client Credentials Flow.
The example below describes the setup in its simpliest form. The token endpoint logic can be extended to handle more advanced logic, such as scopes and user store lookups, by adding the required valves to the token endpoint execution flow.
Add a Relying party
Use a scenario to add a relying party.
Add OpenID Connect Provider
Use a scenario to add an OpenID Connect Provider.
Select Authorization Code flow.
Assign the added RP to use the OpenID Connect Provider.
Modify token endpoint to align to client credentials flow
- Login to Configuration Manager
- Locate the newly added OpenID Connect Provider
- Click to edit
- Execution flow
- Expand Token endpoint
- Delete SessionResolveValve and OIDCTokenRequestValidationValve.
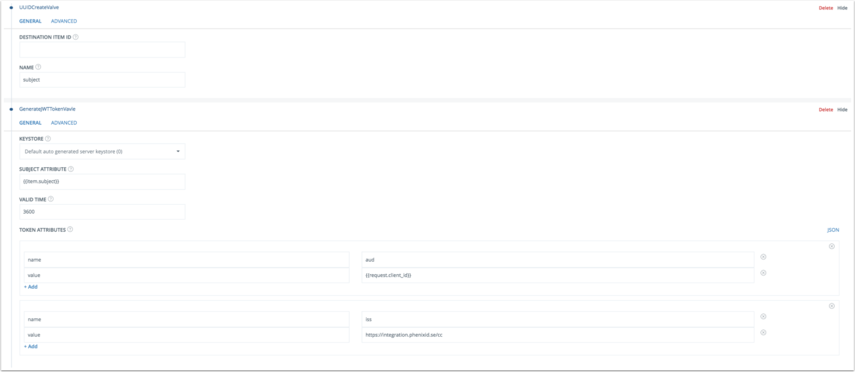
- Expand UUIDCreateValve
- Change access_token to subject
- Move UUIDCreateValve before GenerateJWTTokenValve
- Expand the GenerateJWTTokenValve
- Change Subject Attribute to {{item.subject}}
- Change Valid time to 3600
- Below Token Attributes, remove the key-value pairs nonce, amr, family_name, given_name
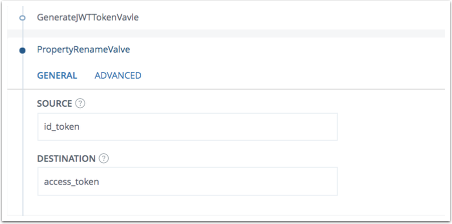
- Click Add valve
- Select PropertyRenameValve
- Enter these values and move the valve to be executed after GenerateJWTTokenVavle
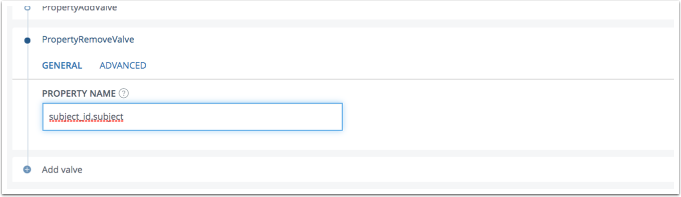
- Expand PropertyRemoveValve
- Add subject to the list of properties to be removed
- Save. Done!