Microsoft Entra ID EAM
Summary
This document will guide you through the steps to integrate with Microsoft Entra ID as an external authentication provider (EAM)
Prerequisites
- PhenixID Authentication services 5.1.2
- Microsoft Entra ID administrative rights.
- Microsoft Entra ID corporate domain registered.
- Users provisioned to Microsoft Entra ID.
Background
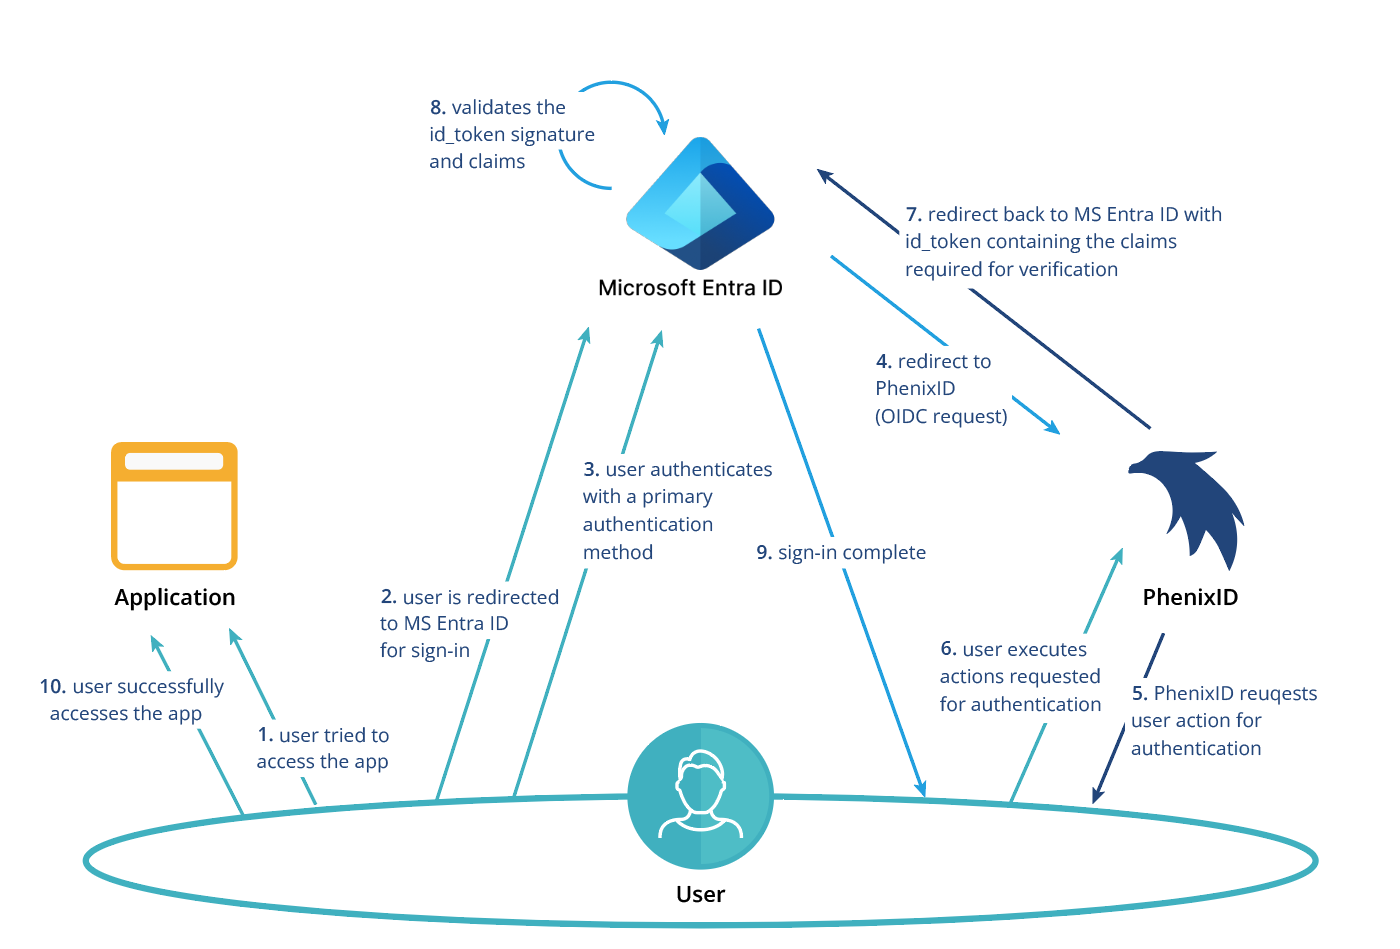
Microsoft Entra ID External Authentication Method or for short EAM. Enables third parties to satisfied multifactor requirements Conditional Access policies. Meaning that PhenixID Authentication Service(PAS) can add for example Swedish BankID, Freja eID or Siths as login methods in Conditional Access policies.
EAM uses OpenID connect as integration protocol and PhenixID Authentication Services will integrate as an OpenID connect provider with the addition that an id_token sent from Entra ID needs to be verified.
The flow looks like this:
Read more here about EAM here, Microsoft Entra ID EAM
Instructions
Configure PhenixID Authentication Services as OIDC OP
- Setup PhenixID Authentication Services as a OIDC OP. and Enable "allowSubOverride": "true". We need to return the same sub that is sent in the initial request. The following claims must be returned in the openid scope:
[
      "scope_claims": [
    {
     "name": "openid",
     "claims": [
      {
       "name": "acr"
      },
      {
       "name": "amr",
       "type": "array"
      }
     ]
    }
]
- Add a relaying party, here is how RP set the following configuration parameters:
- Client_id = phenix
- Password = phenix
Configure the appropriate authenticators
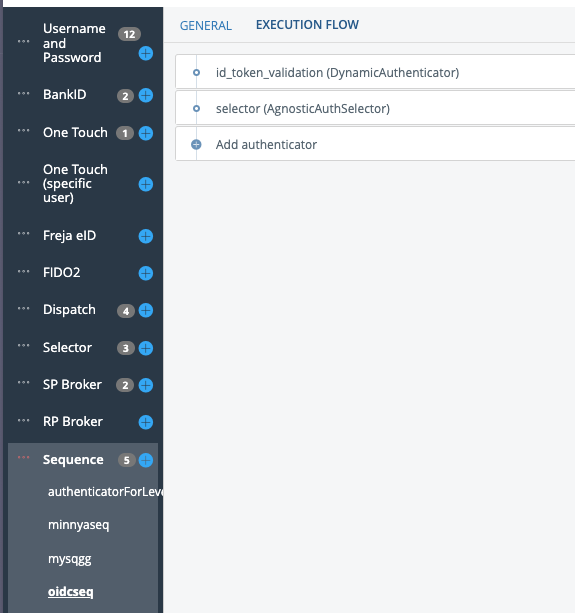
Add two Dynamic authenticator that should only run a pipe. Call them id_token_validation and id_token_unwrap described in DynamicAuthenticator.
Add a Sequence authenticator. Set the previously added Dynamic authenticator id_token_validation as first authenticator. Next authenticator could be what you want in this example a selector. We want to provide multiple login methods for the users. Set that as authenticator on you OIDC OP.
Deploy the oidc discovery module and change url to "https://login.microsoftonline.com/common/v2.0/.well-known/openid-configuration"
example:
[
   {
       "id": "microsoft",
       "url": "https://login.microsoftonline.com/common/v2.0/.well-known/openid-configuration"
   }
]
Now we need to configure the id_token_unwrap authenticator. Go to the execution flow and remove all valves and add a IDTokenUnwrapAndVerifyValve with the following configuration:
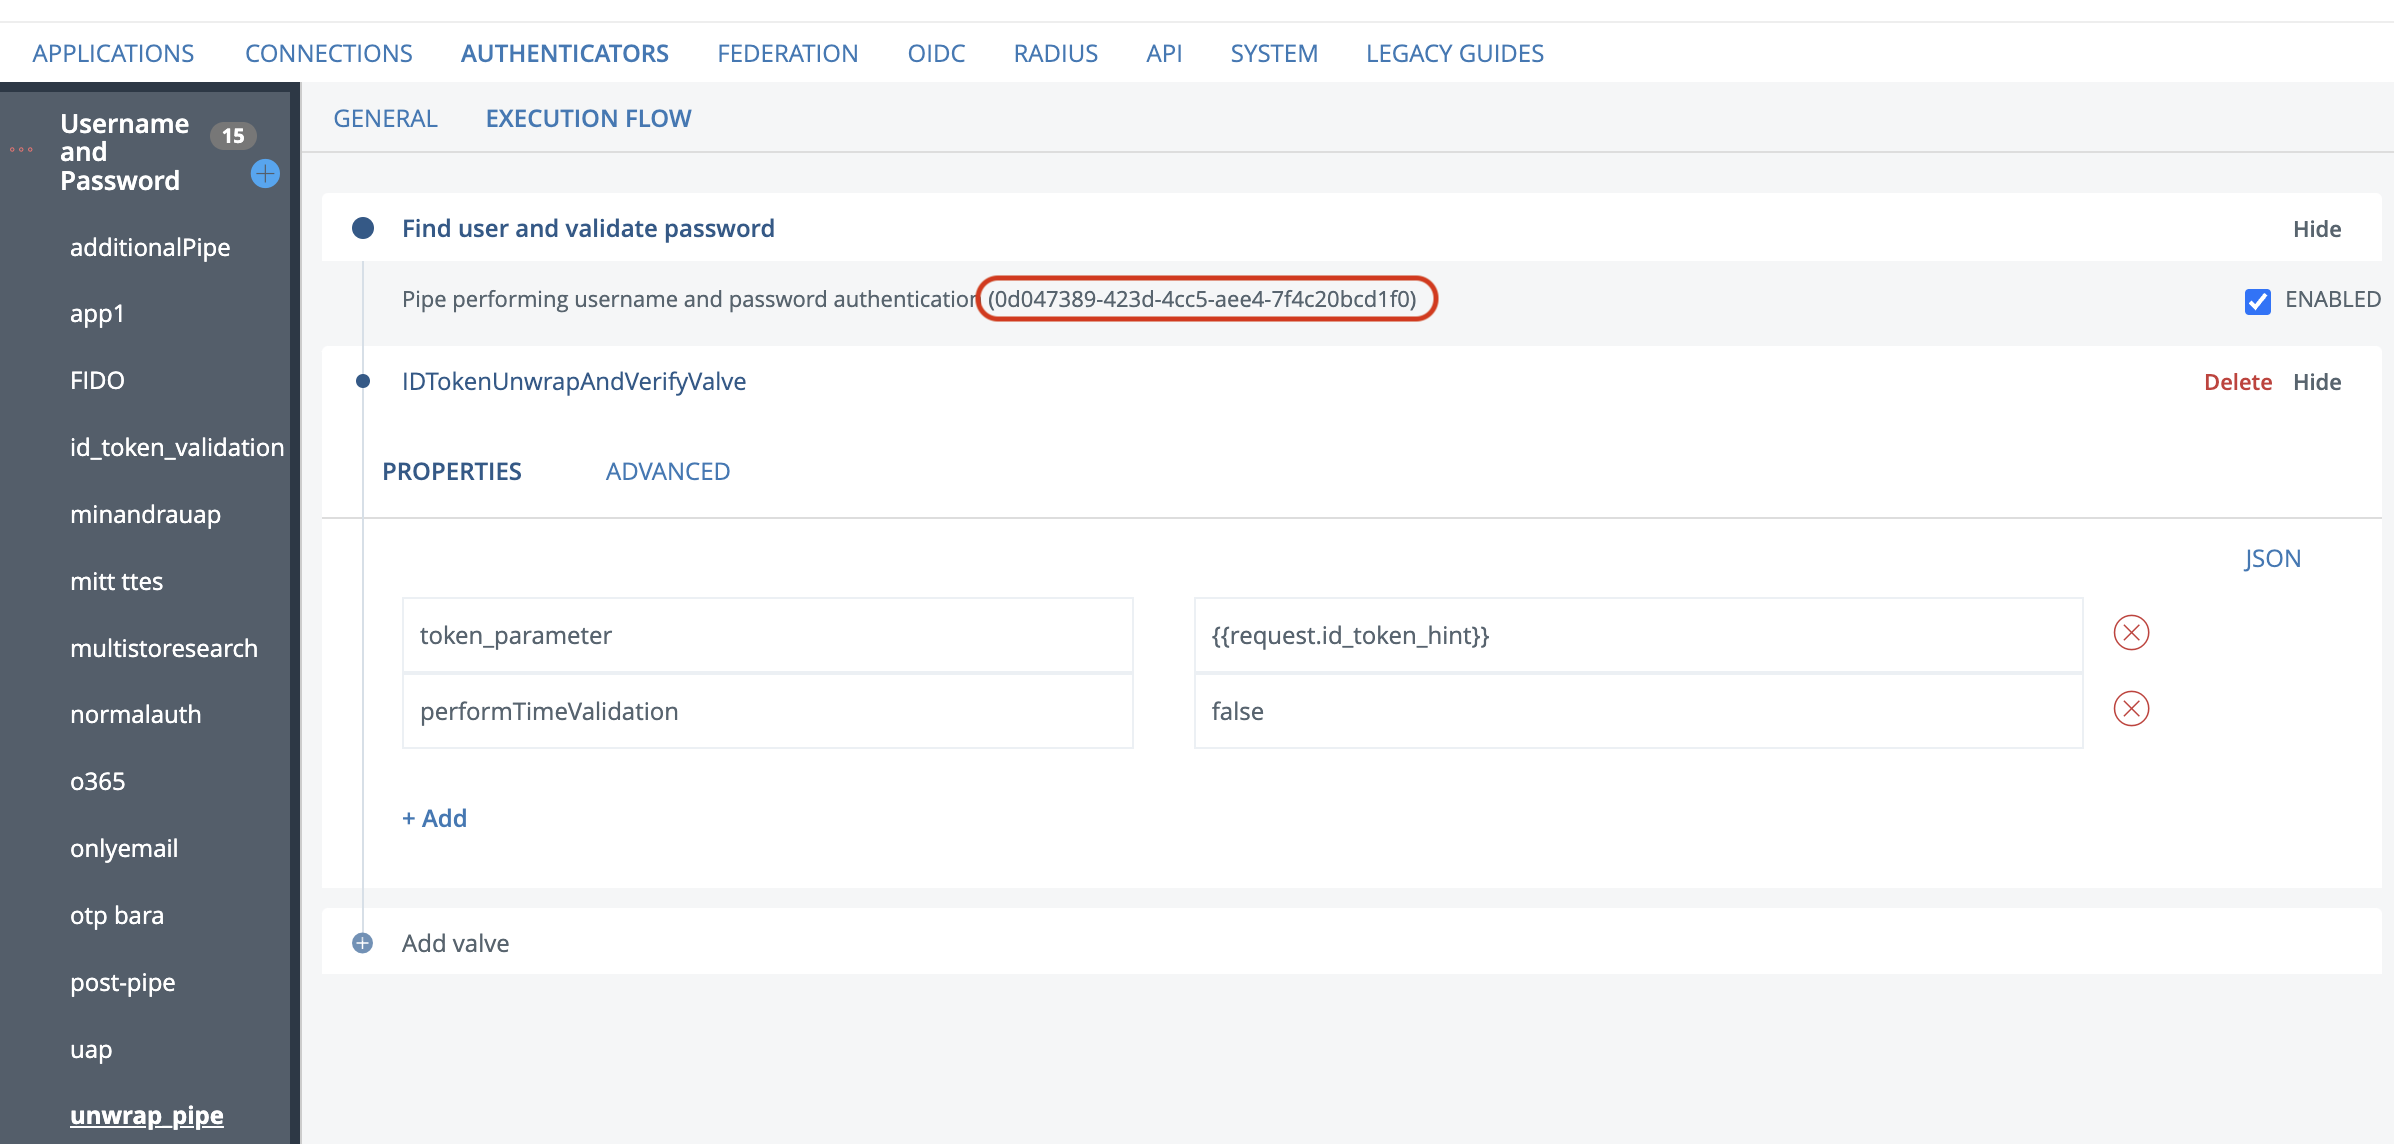
Note that performTimeValidation is set to false due to the id_token issued by microsoft is set to expire immediately. Copy the Pipe ID and save it, we need it in the next step.
- Next configure id_token_validation authenticator with the following valves:
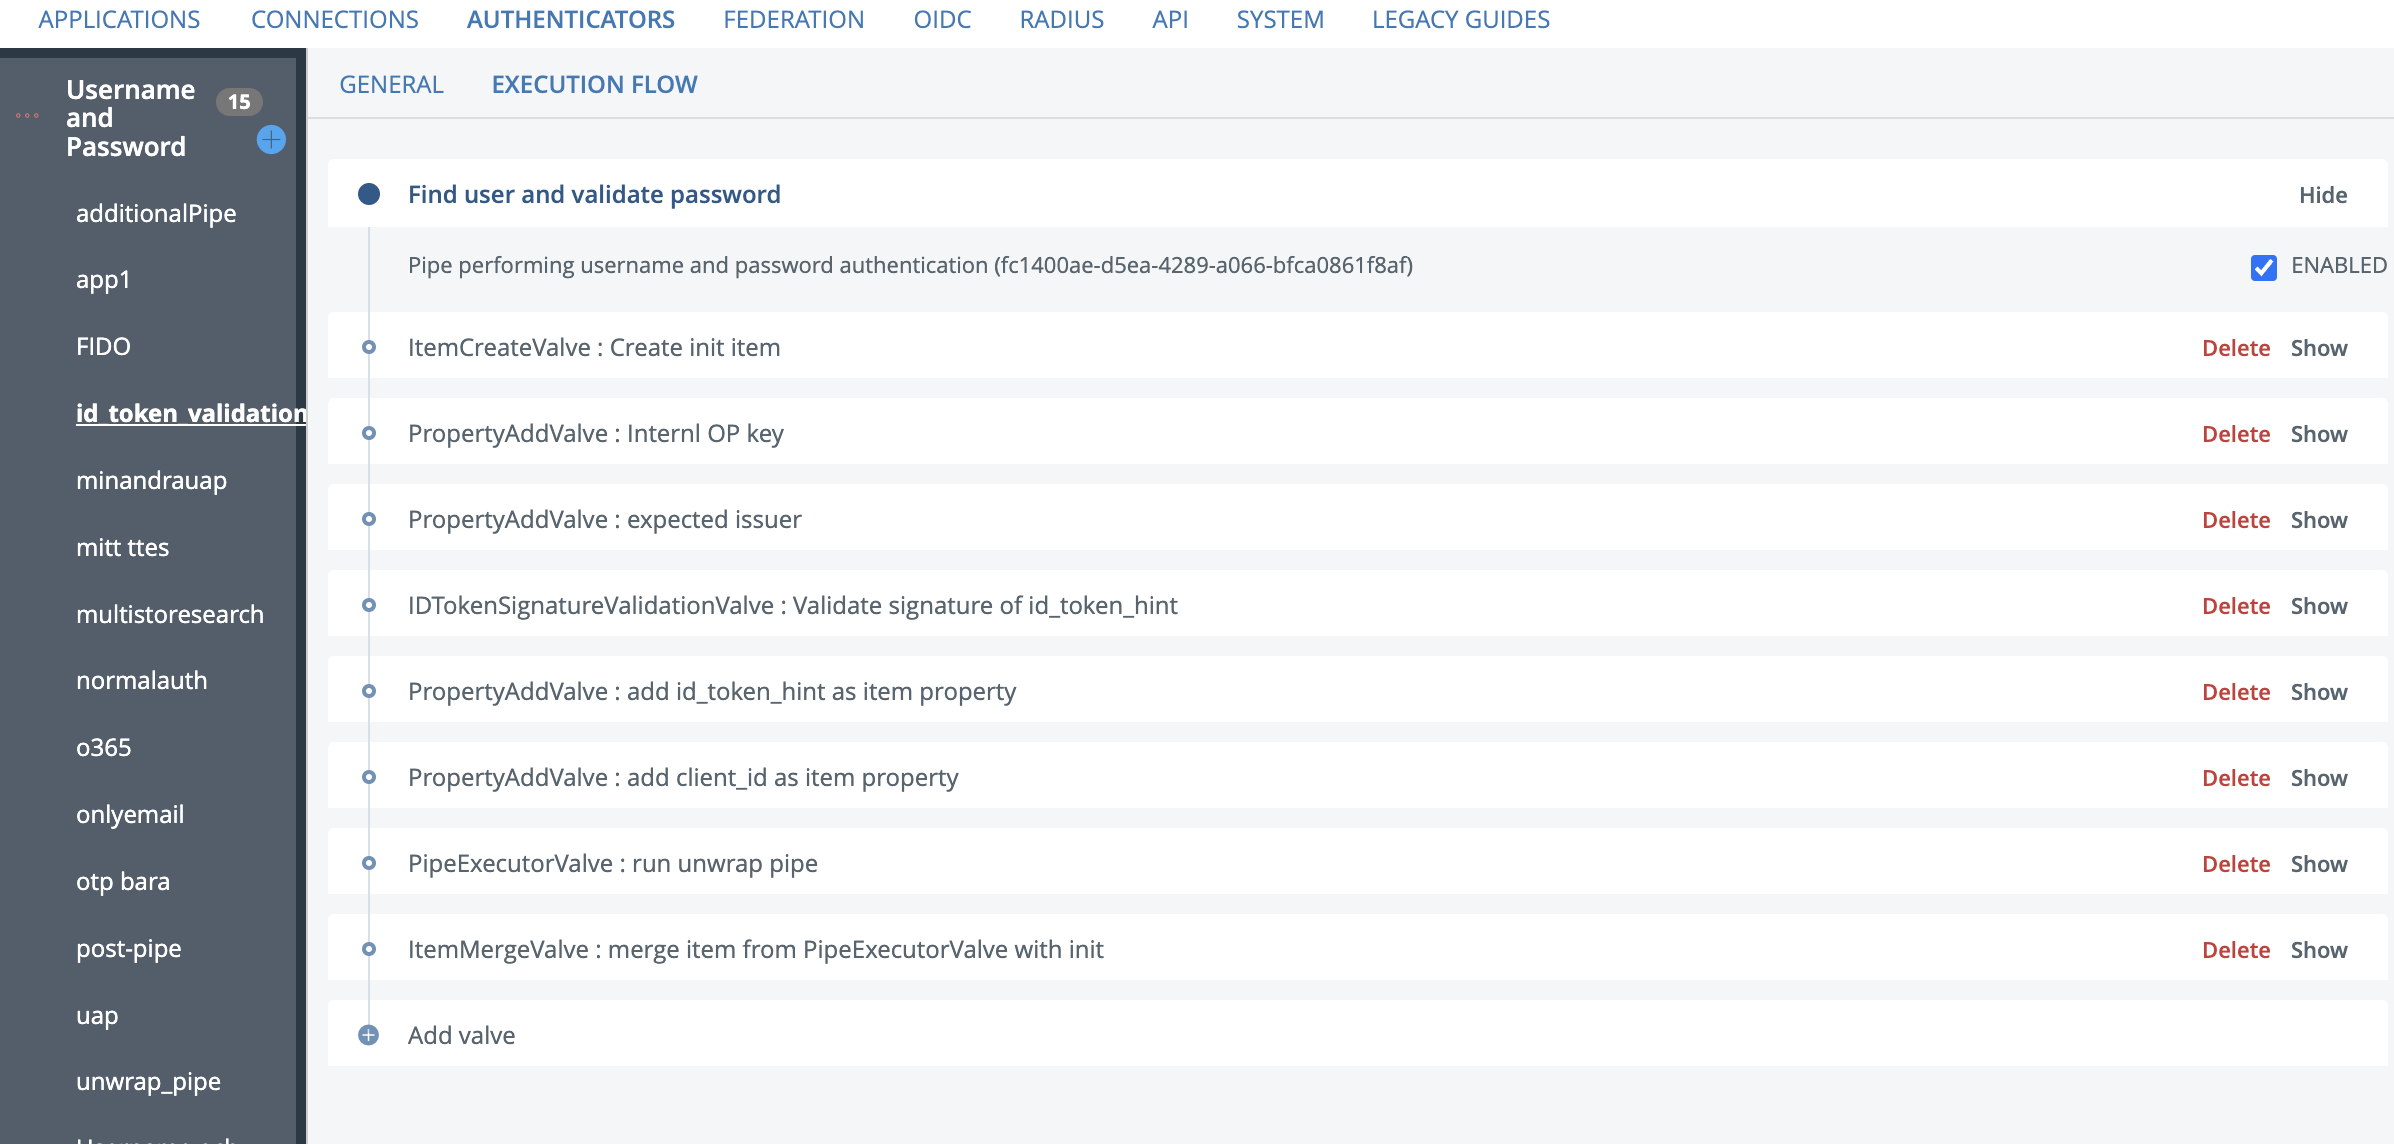
valve configuration for each valve:
[
 {
  "name": "ItemCreateValve",
  "config": {
   "dest_id": "dummy"
  },
  "description": "Create init item"
 },

 {
  "name": "PropertyAddValve",
  "config": {
   "name": "internal_op_id_key",
   "value": "microsoft",
   "splitter": ","
  },
  "description": "Internl OP key"
 },

 {
  "name": "PropertyAddValve",
  "config": {
   "name": "expected_issuer",
   "value": "https://login.microsoftonline.com/CHANGE_TENANT_ID/v2.0",
   "splitter": ","
  },
  "description": "expected issuer"
 },

 {
  "name": "IDTokenSignatureValidationValve",
  "config": {
   "token_parameter": "id_token_hint",
   "internal_op_id_key": "{{item.internal_op_id_key}}"
  },
  "description": "Validate signature of id_token_hint"
 },

 {
  "name": "PropertyAddValve",
  "config": {
   "name": "id_token_hint",
   "value": "{{request.id_token_hint}}",
   "splitter": ","
  },
  "description": "add id_token_hint as item property",
 },

    {
  "name": "PropertyAddValve",
  "config": {
   "name": "client_id",
   "value": "CHANGE_CLIENT_ID",
   "splitter": ","
  },
  "description": "add client_id as item property",
 },

   {
  "name": "PipeExecutorValve",
  "config": {
   "pipe_id": "CHANGE_PIPE_ID"
  },
  "description": "run unwrap pipe",
 },

    {
  "name": "ItemMergeValve",
  "config": {
   "dest_id": "dummy"
  },
  "description": "merge item from PipeExecutorValve with init"
 },
]
- CHANGE_TENANT_ID = This will be your Entra ID tenant ID found in EntraID admin under Overview.
- CHANGE_CLIENT_ID = Application ID generated when configuring the EntraID part of this guide step 5.
- CHANGE_PIPE_ID = Pipe id from step 6 in the id_token_unwrap
- Now we need to add the ACR and AMR value to the flow. These will be different depending on what login method was used. We recommend that you set these values on the authenticator for that method. Add the following configuration to your authenticator:
Here we need to add the claims that are supported by microsoft Supported ACR claims and Supported AMR claims
Add two PropertyAddValves at the end of your flow with this configuration:
[
   {
  "name": "PropertyAddValve",
  "config": {
   "name": "amr",
   "value": "fido",
   "splitter": ","
  },
  "description": "add id_token_hint as item property",
 },

    {
  "name": "PropertyAddValve",
  "config": {
   "name": "acr",
   "value": "possessionorinherence",
   "splitter": ","
  },
  "description": "add client_id as item property",
 },
]
Configure Microsoft Entra ID
The instruction below is based on the official Microsoft documentation. Read the documentation for detailed requirements. Also this article contains more information:
Login to Microsoft Entra ID admin center at https://entra.microsoft.com
First a application representing the integration must be created either in each tenant or as an multitenant application. Privileged Role Administrators need to grant consent to the enable the integration for their tenant.
Go to Applications -> App registrations, click "New registration"
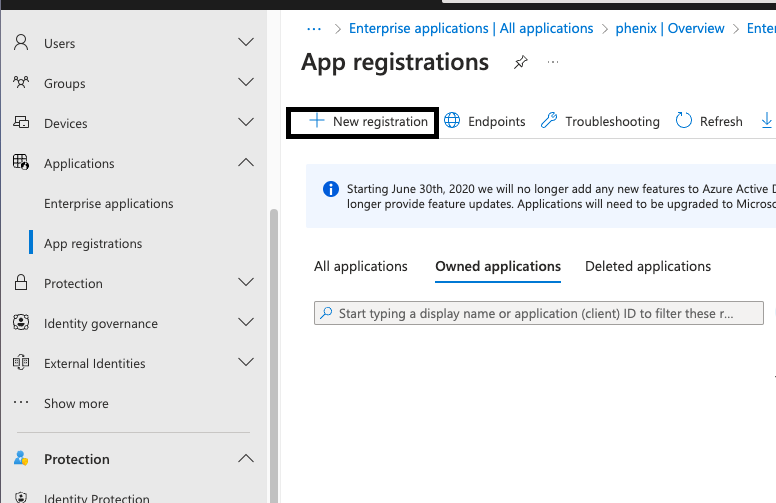
Enter the following information and click register:
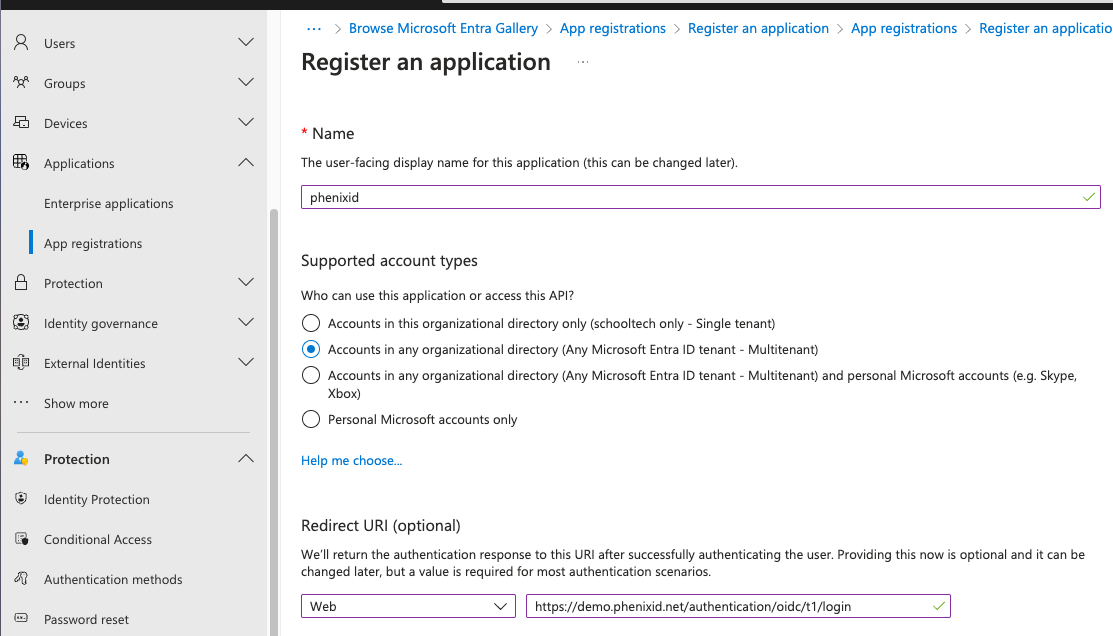
Name: Can be anything just a display name
Supported account types: Set to Accounts in any organizational directory (Any Microsoft Entra ID tenant - Multitenant)
Redirect URI: Should be your authorization endpoint found in https://yourpasurl/tenantname/.well-known/openid-configuration
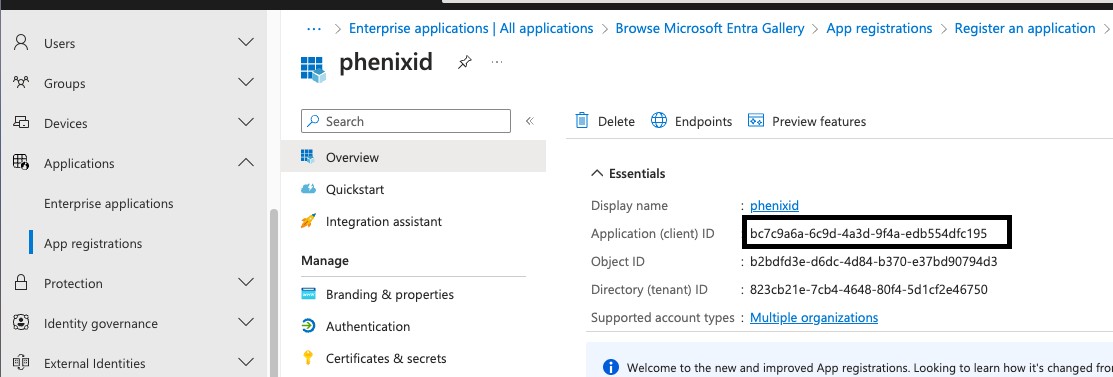
Next copy your Application (client) ID and save it somewhere we need it later:
Next click API permission in your app:
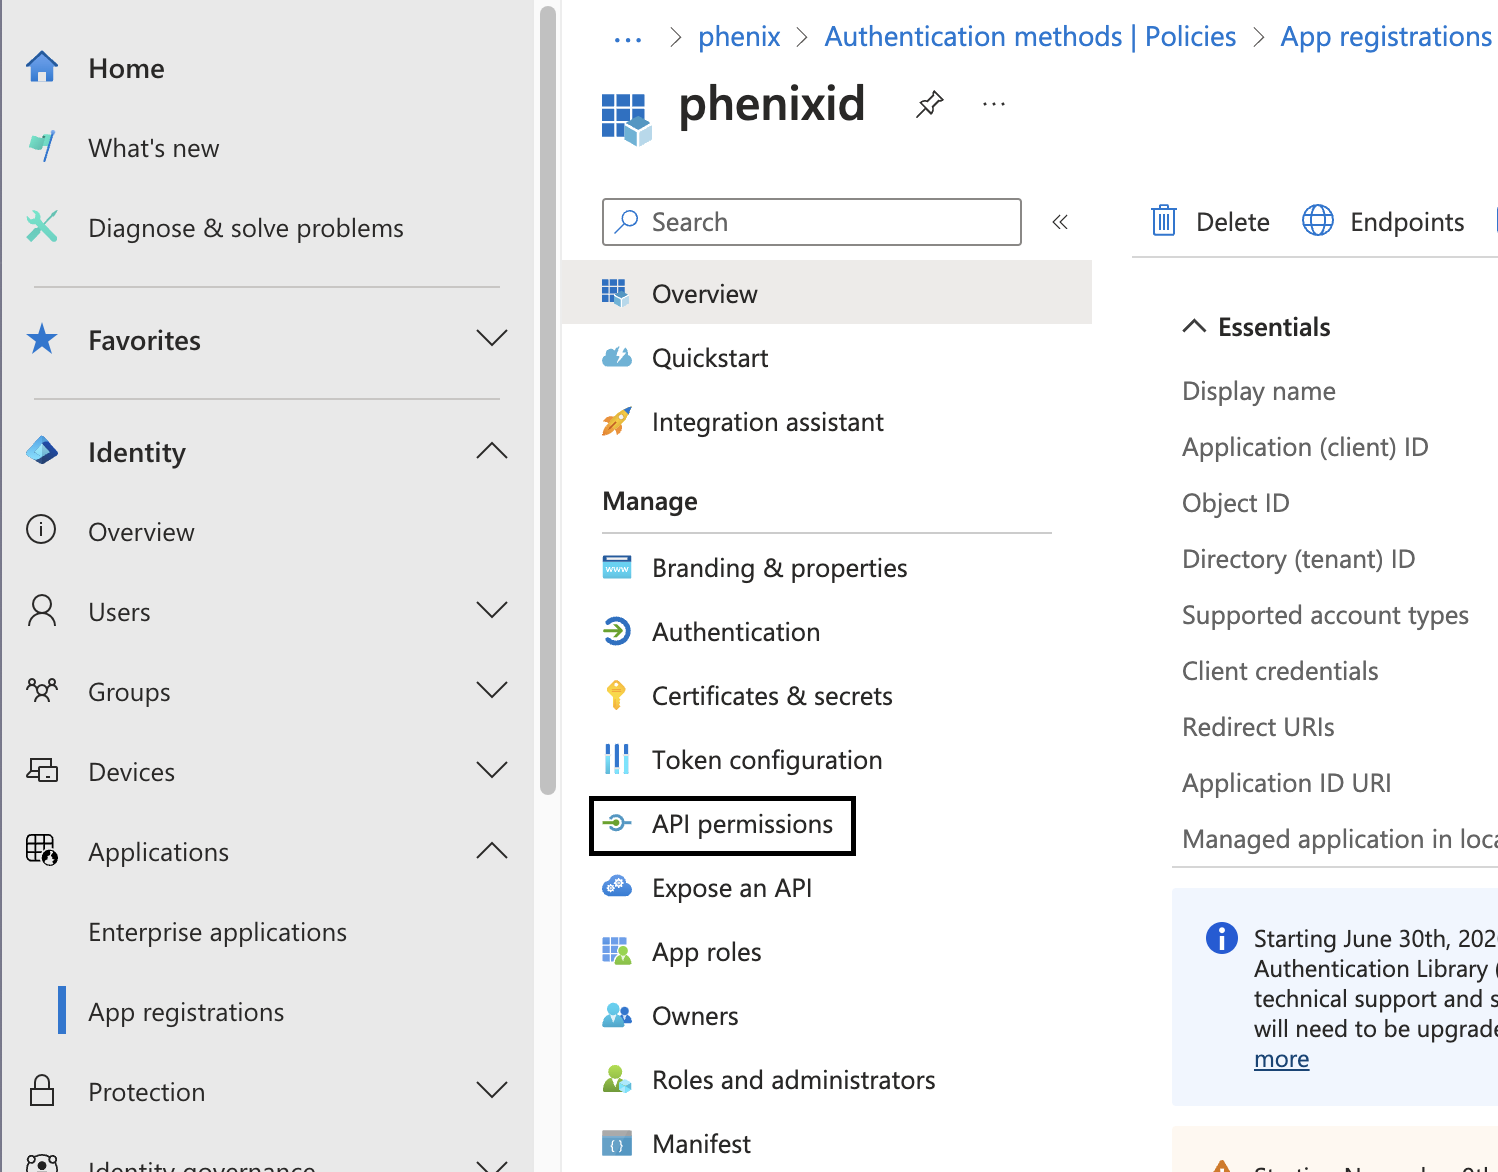
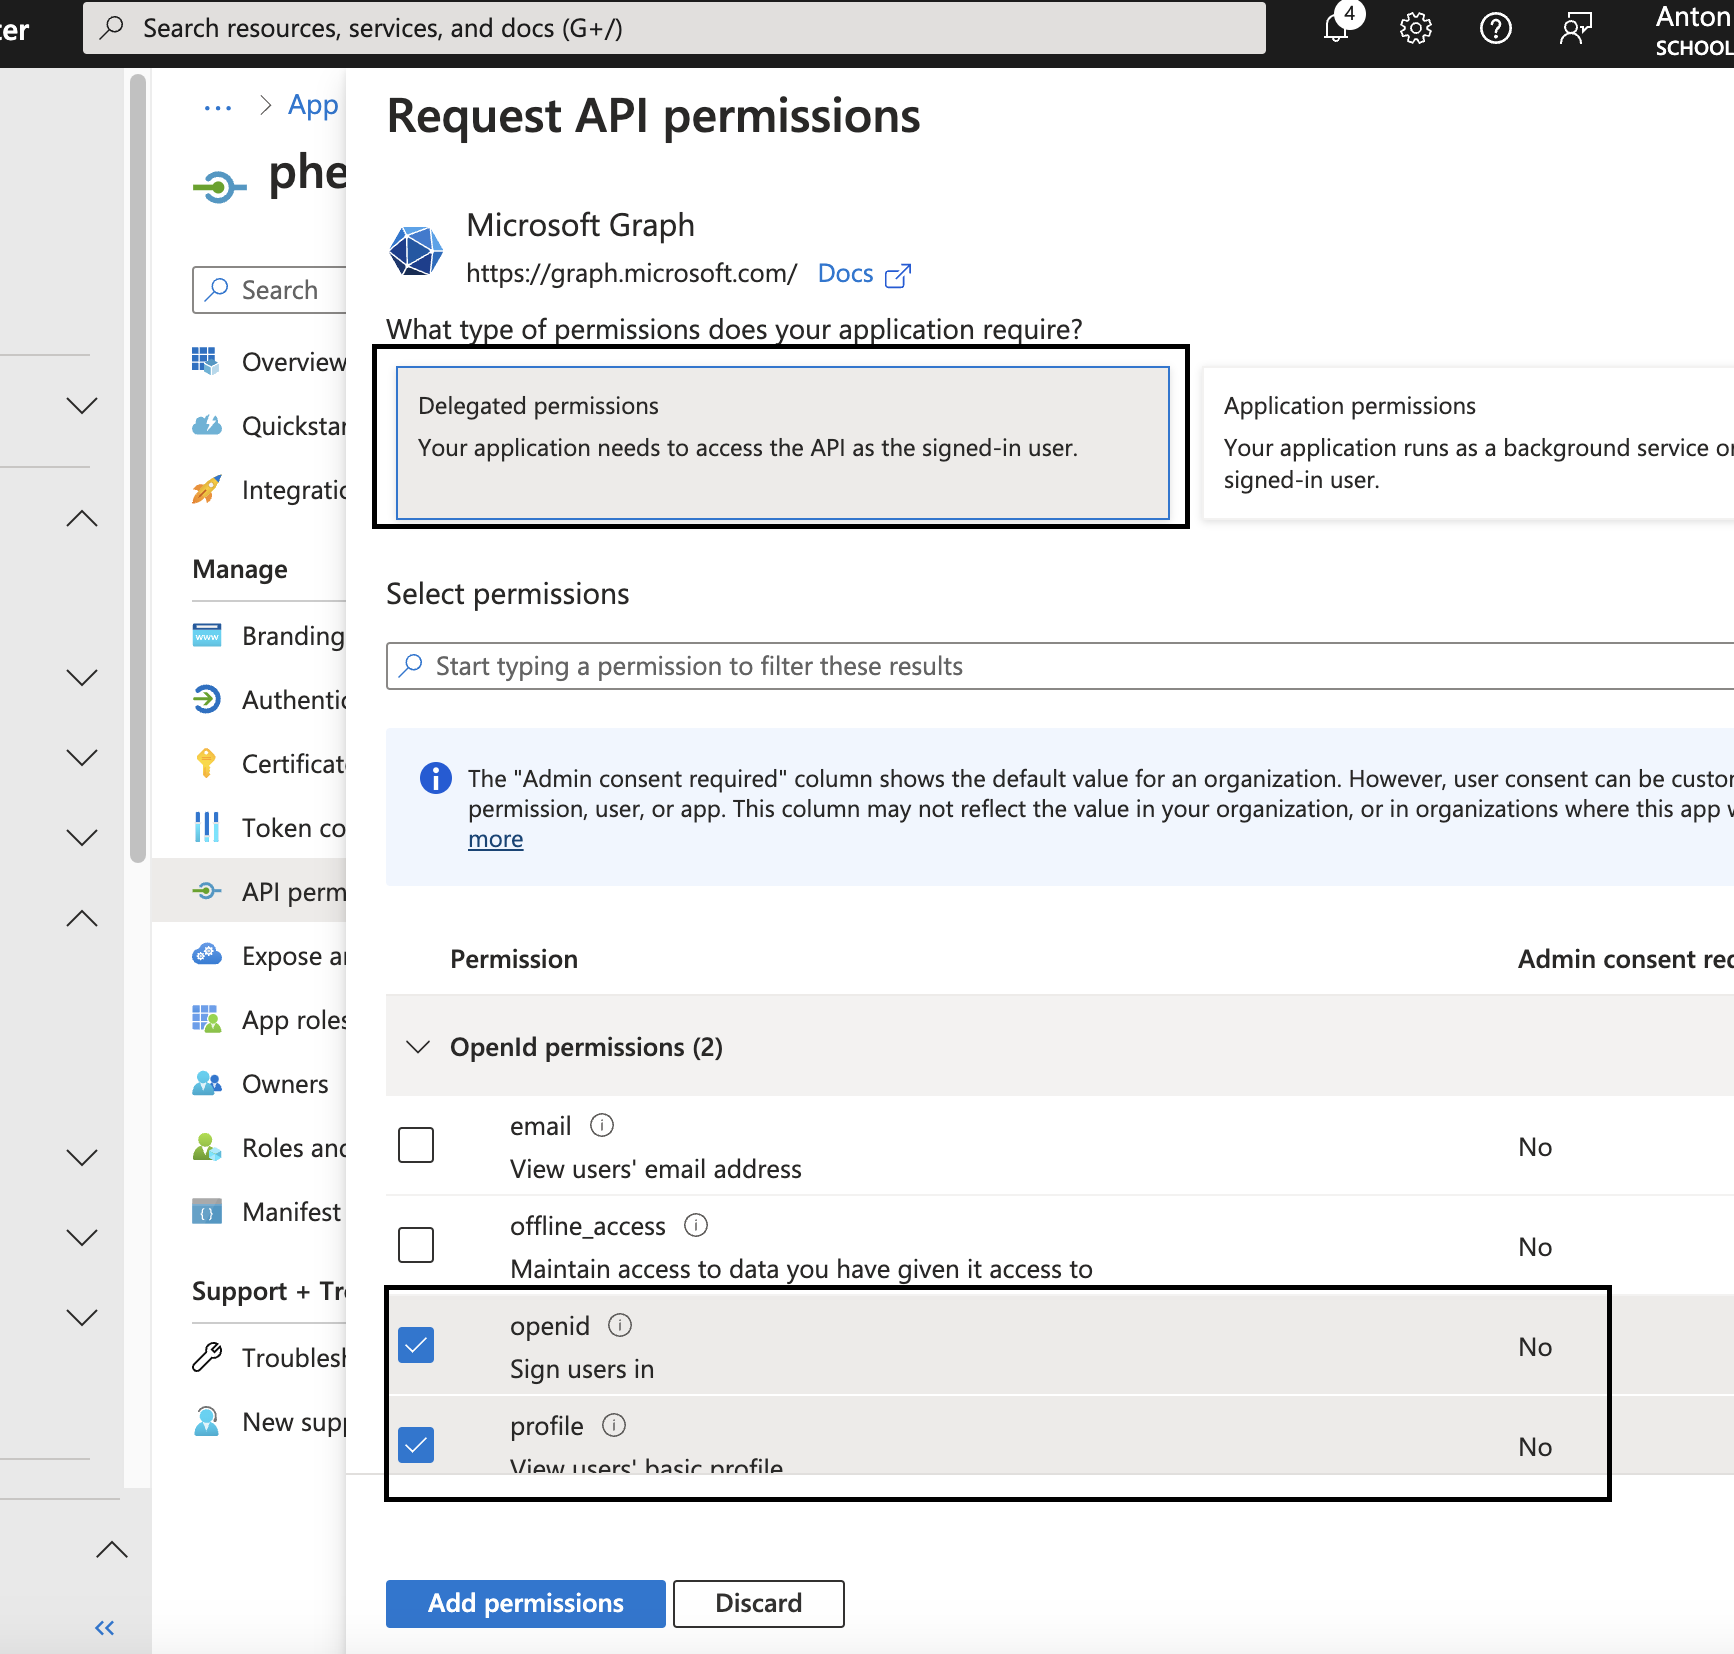
Click "Add a Permission" and select Microsoft Graph.
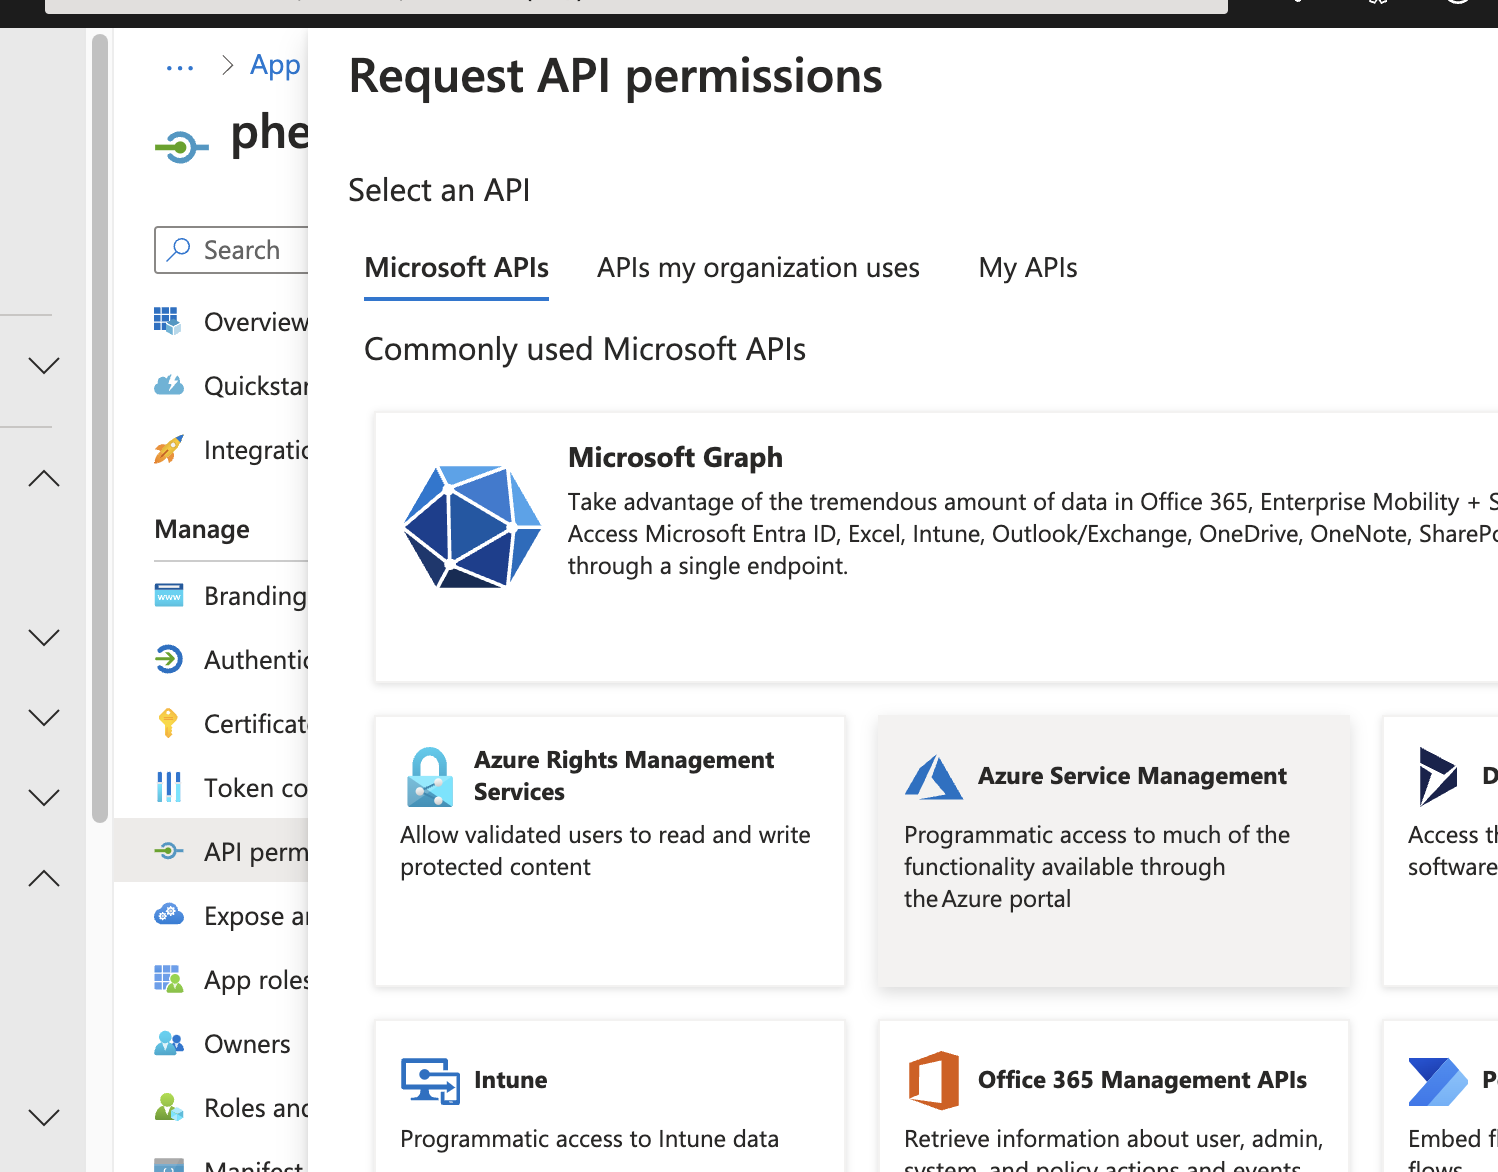
Add openid and profile as delegated permissions.
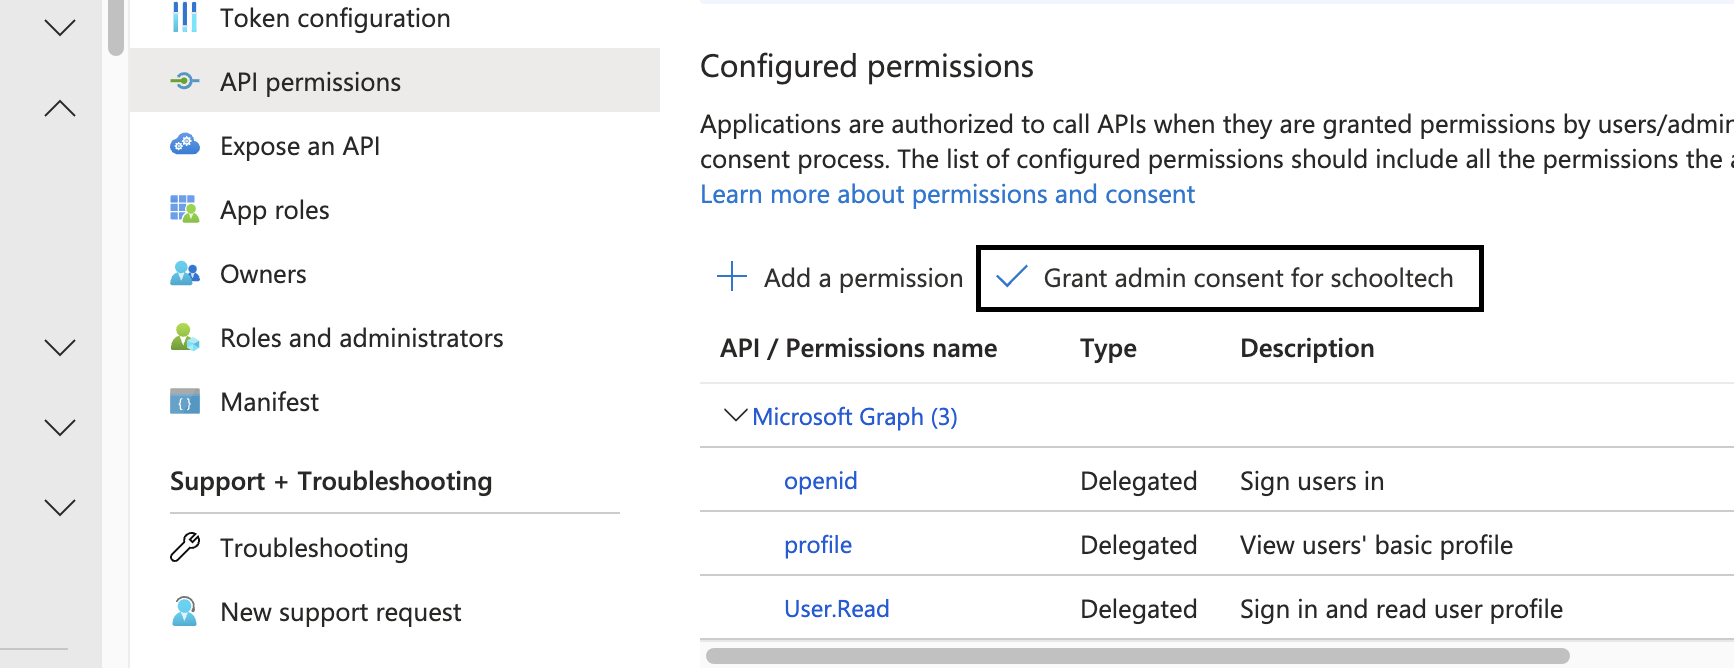
Next click Grant Admin Consent, click yes in the popup.
Next Go to Protection -> Authentication methods -> Add external Method:
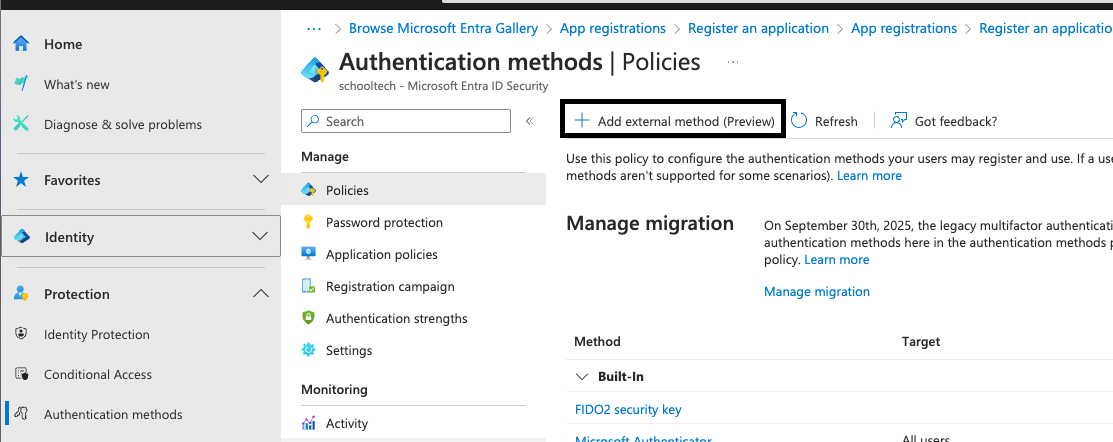
Add teh following information and click Request permission. Follow the steps to grant permissions.
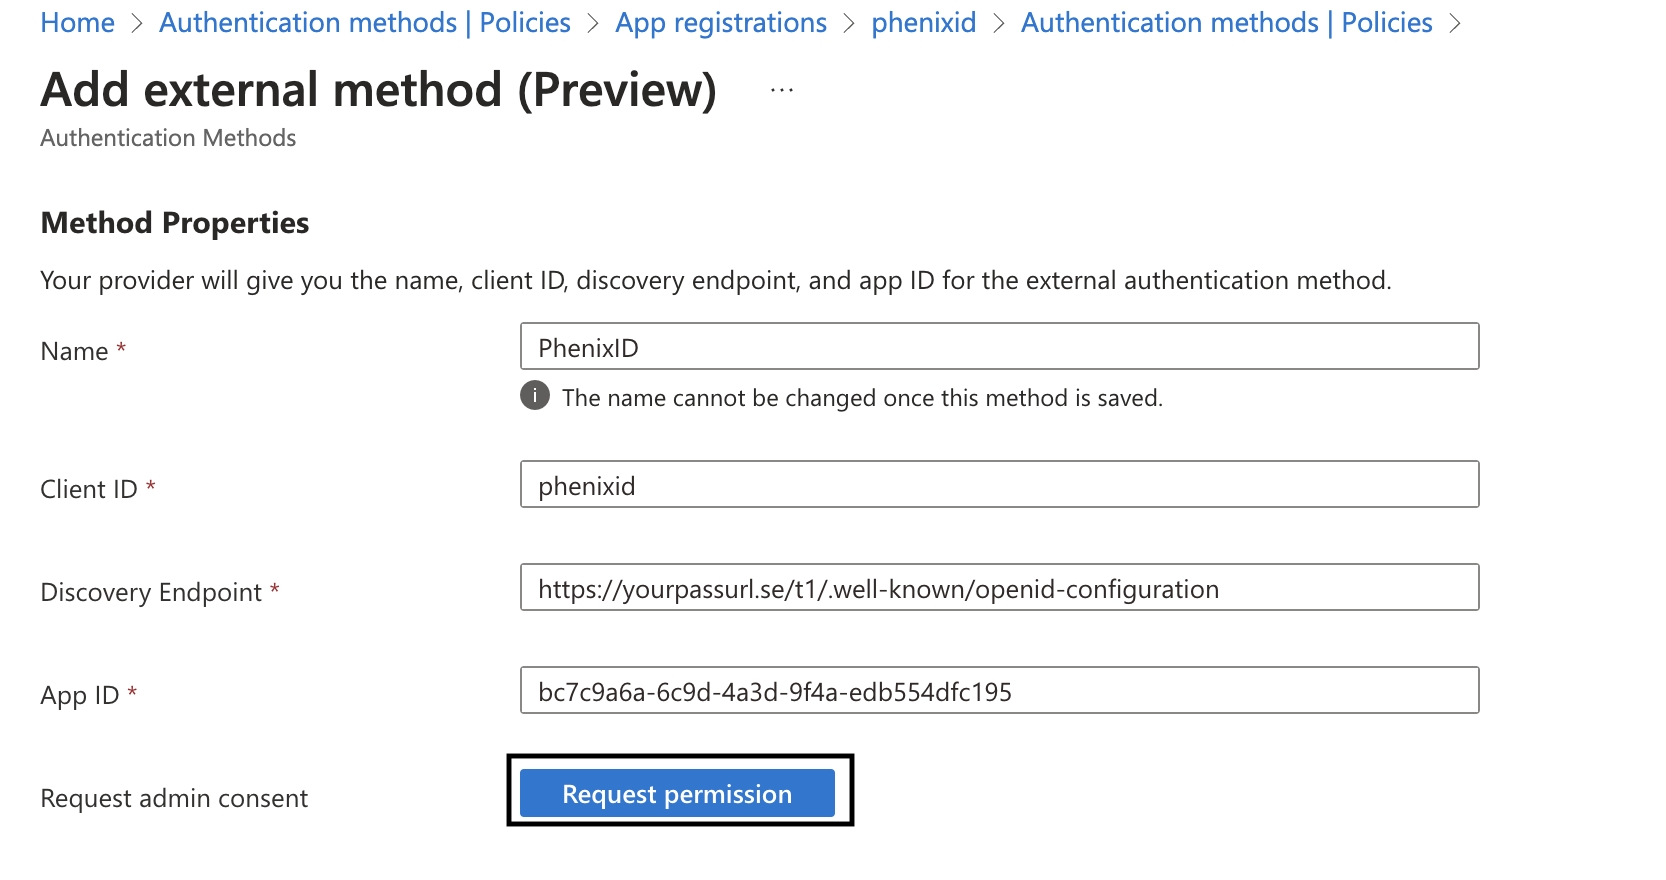
- Name: This is the name that will be displayed to the end users.
- Client ID: The client id (must be the same in PAS)
- App ID: The id from step 5.
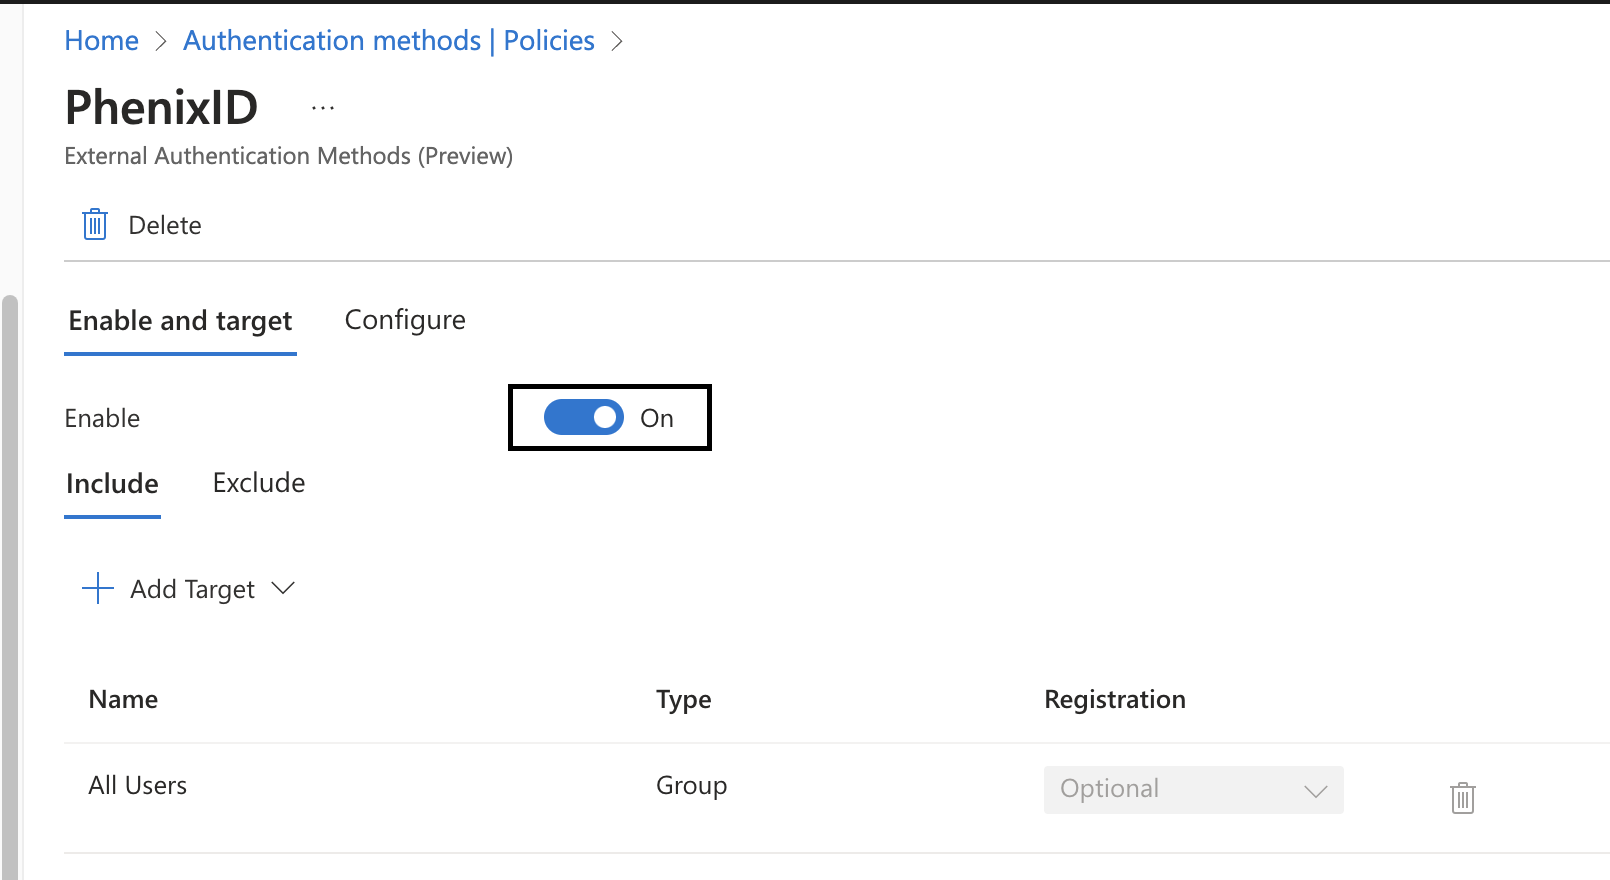
Next enable your EAM method and select what targets. Click save.
Go to Protection -> Conditional Access -> Policies. Click new policy to add a new policy.
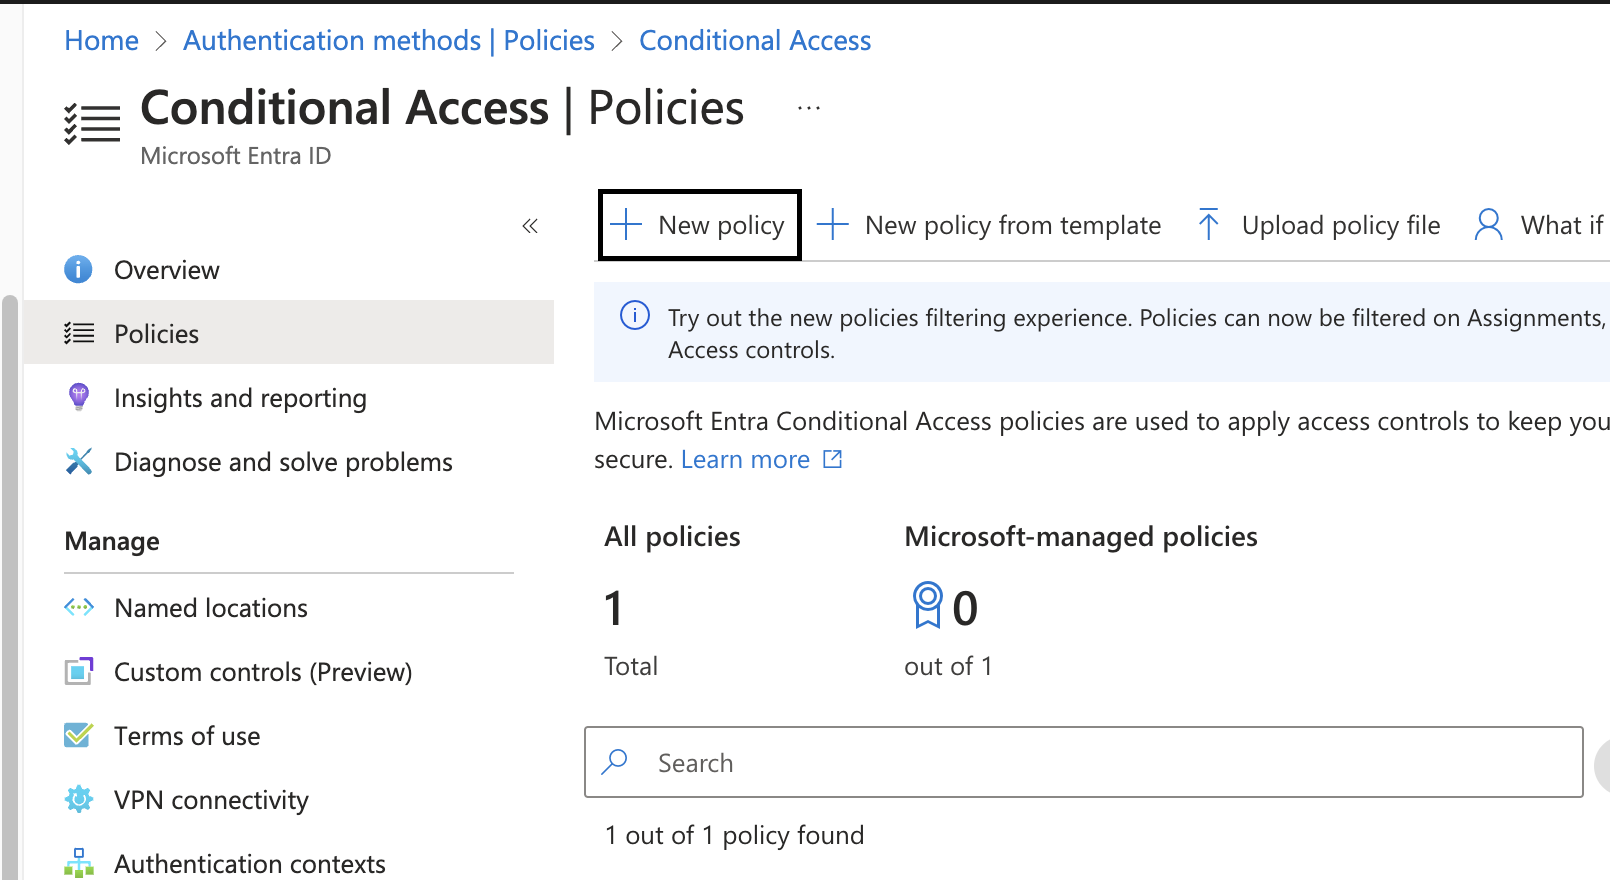
Set the following

- Name: Just a friendly name can be anything.
- Grant: Select Grant access and tick Require multifactor authentication.
- Enable policy: On, use Report-only to test before deploying if needed.
How to test you login
- Browse to office.com
- Click login and enter your mail address and password.
- You should now be able to chose your login method.

- After this you will be redirected to PAS for login.
- Login with PAS and you should be redirected back to Office.com and be signed in.
Considerations
Not that this is what you get back from in the initial request (id_token_hint):
[
   {
  "aud": "YOUR_CLIENT_ID",
  "iss": "https://login.microsoftonline.com/YOUR_TENANTID/v2.0",
  "iat": 1726492404,
  "nbf": 1726492404,
  "exp": 1726493304,
  "name": "Tifanny Sjomenning",
  "oid": "d648272a-e42b-4930-ba5f-8b04e2b3d6fa",
  "preferred_username": "tiffanysjomenning@asd.onmicrosoft.com",
  "sub": "l9QzN_vA227z1AhrgBnaBEzkuxuvjiP7Uz1hEVsZSCs",
  "tid": "823cb21e-7cb4-4650-80f4-5d1cf2f46750",
  "uti": "kWq7LH7HFRSqFWdG0t0SAA",
  "ver": "2.0"
}
]
You have to validate this information against what the user login with. Say the user login with Swedish BankID then we have to validate that the personal number belongs to the actual user in question. Either against local LDAP or against Entra ID.
All information from the id_token_hint will be added to the flow at the start. A LDAPSearchValve can then use the filter userPrincipalName={{item.preferred_username}} for example.