Setup PhenixID Authentication Services as Identity Provider to Nexus GO PDF Signing
Warning
Please note, this document is using the legacy authenticators - in order to use the new protocol agnostic authenticators, you need to apply relevant modifications to the configuration examples outlined in this article.
Summary
This document will guide you through the steps to setup PhenixID Authentication Services (PAS) as Identity Provider to Nexus GO PDF Signing.
System Requirements
- PhenixID Authentication Server 2.0 or higher
- PDF Signing Service added in Nexus GO
Instruction
Configure PhenixID Authentication Services as Identity Provider
Setup PhenixID Authentication Services as a SAML IdP.
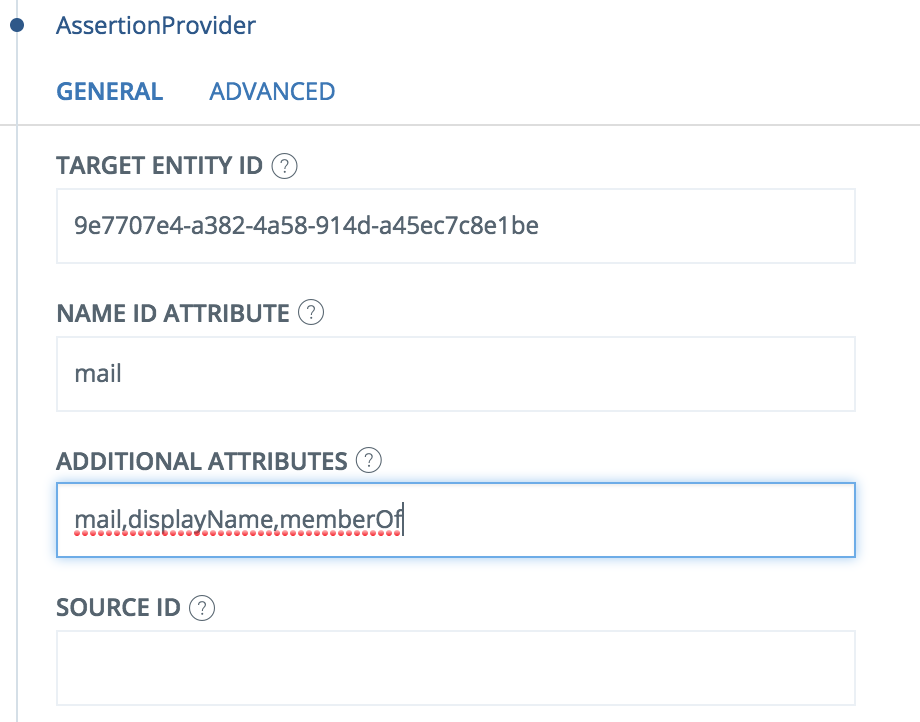
Fetch the mail, displayName and memberOf (OPTIONAL) attributes from the user store. Attribute names may differ depending on user store type.
Use mail as Name ID attribute and mail, displayName and memberOf (OPTIONAL) as additional attributes.
Save.
Go to Scenarios->Federation-> <newly_added_scenario> -> Identity Provider. Deselect “Require signed requests”.
Save.
Then export your SAML IdP metadata by going to the URL:
https://<YourServerDomainName>/saml/authenticate/<authenticator_alias>?getIDPMetaand download the metadata to a xml file.
Configure Nexus GO
Log in to the Nexus GO administration portal:
Go to https://login.go.nexusgroup.com/ and log in with your administrator account.
Click Services and Signing.
Select your PDF Signing environment.
Click Set up local IDP
Enter a Display Name (this is shown within the signing- and admin-portal), and upload IDP SAML Metadata that was downloaded from Hybrid Access Gateway in previous step. Click Next.
Configure SAML mappings then click Next, our example:
emailmailcommonNamedisplayName
Configure Role mappings then click Next, our example:
Role mappingsAttributeValue****contributormemberOfCN=Nexus GO PDF Signing Admin,OU=Groups,DC=demo,DC=phenixidentity,DC=com
Note: the role contributor gives a user access to the admin portal and possibility to create signing requests, multiple values can be added. If check-box Everyone from this IDP is a contributor is selected all users authenticating through the IDP will get access to admin portal.
Confirm your configuration and click Submit.
Now back at the overview of your PDF Signing environment, at SAML SP Metadata, click Download.
Save Logon URL for future step Optional: Add Nexus GO PDF Signing as portal item in PhenixID MyApps portal.
Add Nexus GO PDF Signing as Service Provider in PhenixID Authentication Services
- Login to configuration manager
- Open Scenarios->Federation->SAML Metadata upload
- Click the plus sign
- Add Nexus GO SAML SP Metadata by uploading the SAML SP Metadata downloaded from Nexus GO in the previous chapter.
Optional: Add Nexus GO PDF Signing as portal item in PhenixID MyApps portal
- Add an additional item to MyApps: CreateApplicationValve
- Populate new item with these values:
- URL =
<Logon URL from previous chapter> - applicationName =
Nexus GO PDF Signing
- URL =