Medimo MFA, SSO and authorization with PhenixID Authentication Services
Warning
Please note, this document is using the legacy authenticators - in order to use the new protocol agnostic authenticators, you need to apply relevant modifications to the configuration examples outlined in this article.
Summary
This document will guide you through the steps to enable multi-factor authentication and Single-Sign On for the dutch healthcare prescribing and administration solution Medimo (https://www.medimo.nl), using OpenID Connect.
System Requirements
- PhenixID Authentication Server 5.0 or higher
- Medimo technical contact
Instruction
Overview
This document will guide you through the steps to enable multi-factor authentication and Single-Sign on for Medimo.
The authorative permissions in Medimo are also populated by PhenixID Authentication Services.
PhenixID Authentication Services acting as OpenID Connect Provider
Setup PAS as OpenID Connect Provider
Login to Configuration Manager.
Scenarios->OIDC
Add a new relying party:
- client_id =
medimo - client_password =
<create a password and set> - Allowed redirect uri:s =
<ask the Medimo admin which value(s) to use>
- client_id =
Create a new OpenID Connect provider by selecting the desired authentication method. Follow the scenario guidelines for values.
Use the Authorization Code Flow.
Allow medimo as an allowed RP to use the OP.
(Points 6-9 below is only necessary with PAS version 4.0 or previous).
Click Execution flow
Expand Token endpoint
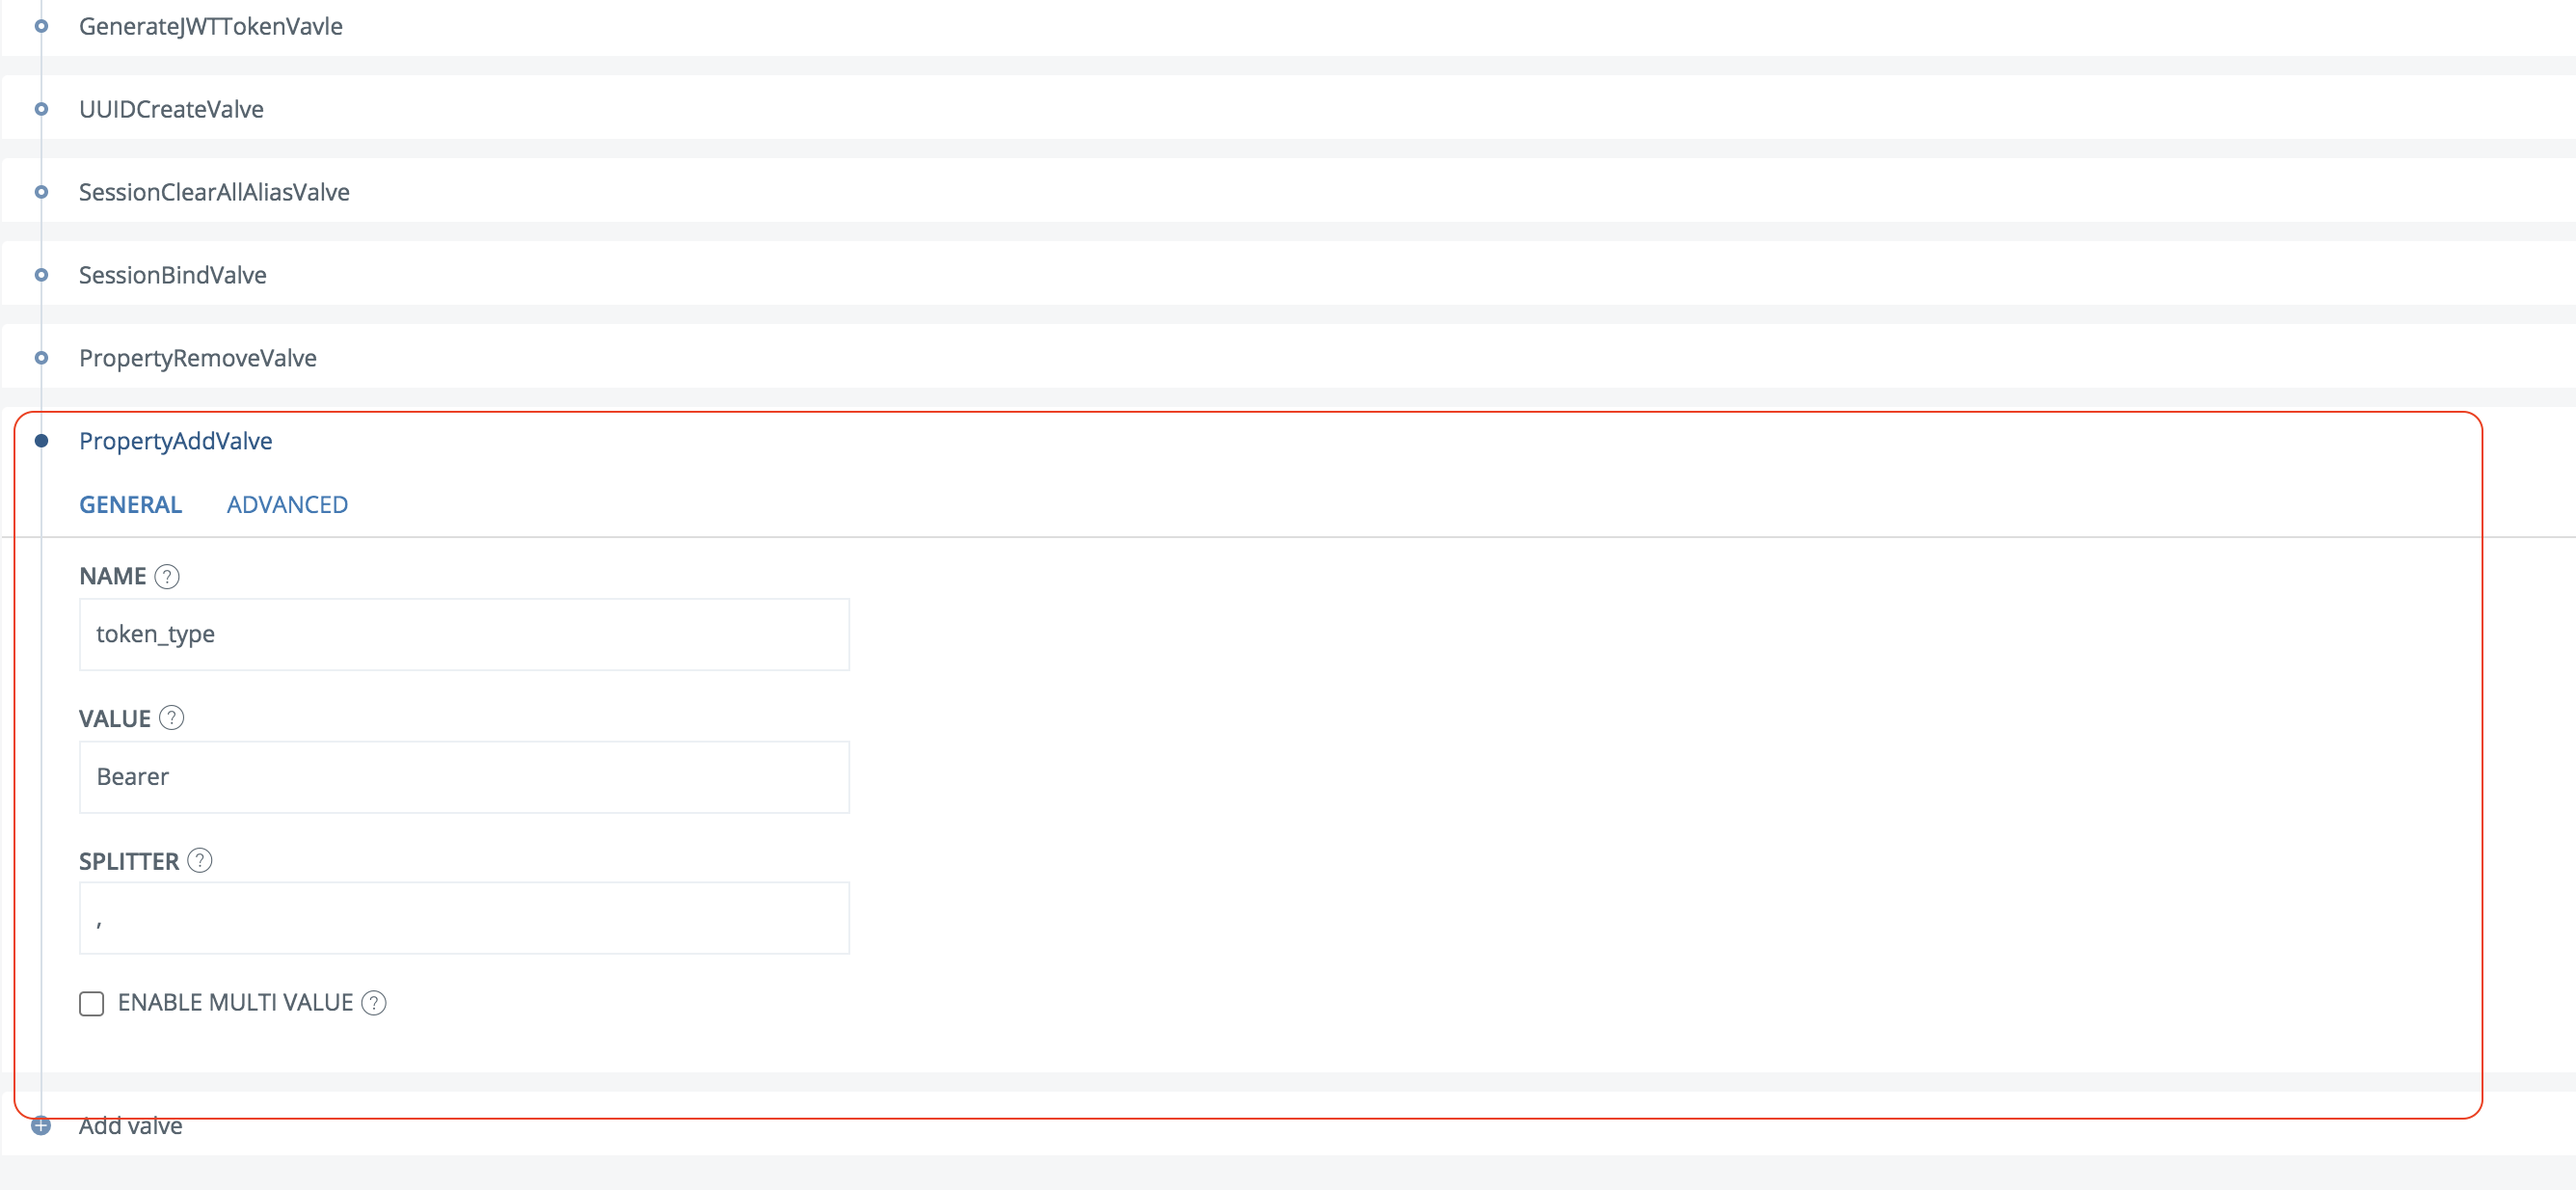
Click Add Valve
Select PropertyAddValve
Enter name = token_type and value = Bearer. Make sure the valve is placed last in the execution flow.
Save the changes
Set the proper amr claim value by following this guide.
Click Advanced->Modules
Locate the com.phenixidentity~phenix-api-authenticate module
In the tenants section, locate the tenant id for the OP just setup
Add these settings on the tenant:
"outPutHandler": "com.phenixidentity.api.authenticate.handler.output.custom.OIDCEndpointsDataConverter",And
"userinfo_medimo"to allowedOperation.Example:

Click Stage changes and Commit changes
Click Advanced->Pipes.
Add the pipe below.
Note
The autorisatie item property defines the claim that will be used for permissions. In the example below it’s “hardcoded” to doctor,nurse.
Ask your Medimo contact for expected values. Map the values to your user store permission control, such as AD user groups. Reconfigure the pipe using the correct valves according to your requirements and values.
Please ask PhenixID for additional assistance.
{
  "id": "userinfo_medimo",
  "valves": [
    {
      "name": "ItemCreateValve",
      "config": {
        "dest_id": "userinfo_props"
      }
    },
    {
      "name": "PropertyAddValve",
      "config": {
        "name": "authorization",
        "value": "{{request.Authorization}}"
      }
    },
    {
      "name": "PropertyReplaceValve",
      "config": {
        "source": "authorization",
        "dest": "access_token",
        "token": "Bearer ",
        "replacement": ""
      }
    },
    {
      "name": "SessionResolveValve",
      "config": {
        "alias": "{{item.access_token}}",
        "require_session": "true",
        "require_auth_session": "false"
      }
    },
    {
      "name": "PropertyAddValve",
      "config": {
        "name": "name",
        "value": "{{session.givenName}} {{session.sn}}"
      }
    },
    {
      "name": "PropertyAddValve",
      "config": {
        "name": "given_name",
        "value": "{{session.givenName}}"
      }
    },
    {
      "name": "PropertyAddValve",
      "config": {
        "name": "family_name",
        "value": "{{session.sn}}"
      }
    },
    {
      "name": "PropertyAddValve",
      "config": {
        "name": "email",
        "value": "{{session.mail}}"
      }
    },
    {
      "name": "PropertyAddValve",
      "config": {
        "name": "autorisatie",
        "value": "doctor"
      }
    },
    {
      "name": "PropertyAddValve",
      "config": {
        "name": "autorisatie",
        "value": "nurse"
      }
    },
    {
      "name": "PropertyAddValve",
      "config": {
        "name": "sub",
        "value": "{{session.user_id}}"
      }
    },
    {
      "name": "PropertyAddValve",
      "config": {
        "name": "preferred_username",
        "value": "{{session.mail}}"
      }
    },
    {
      "name": "PropertyRemoveValve",
      "config": {
        "name": "access_token,authorization"
      }
    }
  ],
  "created": "2017-11-13T09:53:46.595Z"
}
Click Stage changes and commit changes
Click Advanced->OIDC OP
Locate the OP created in previous step
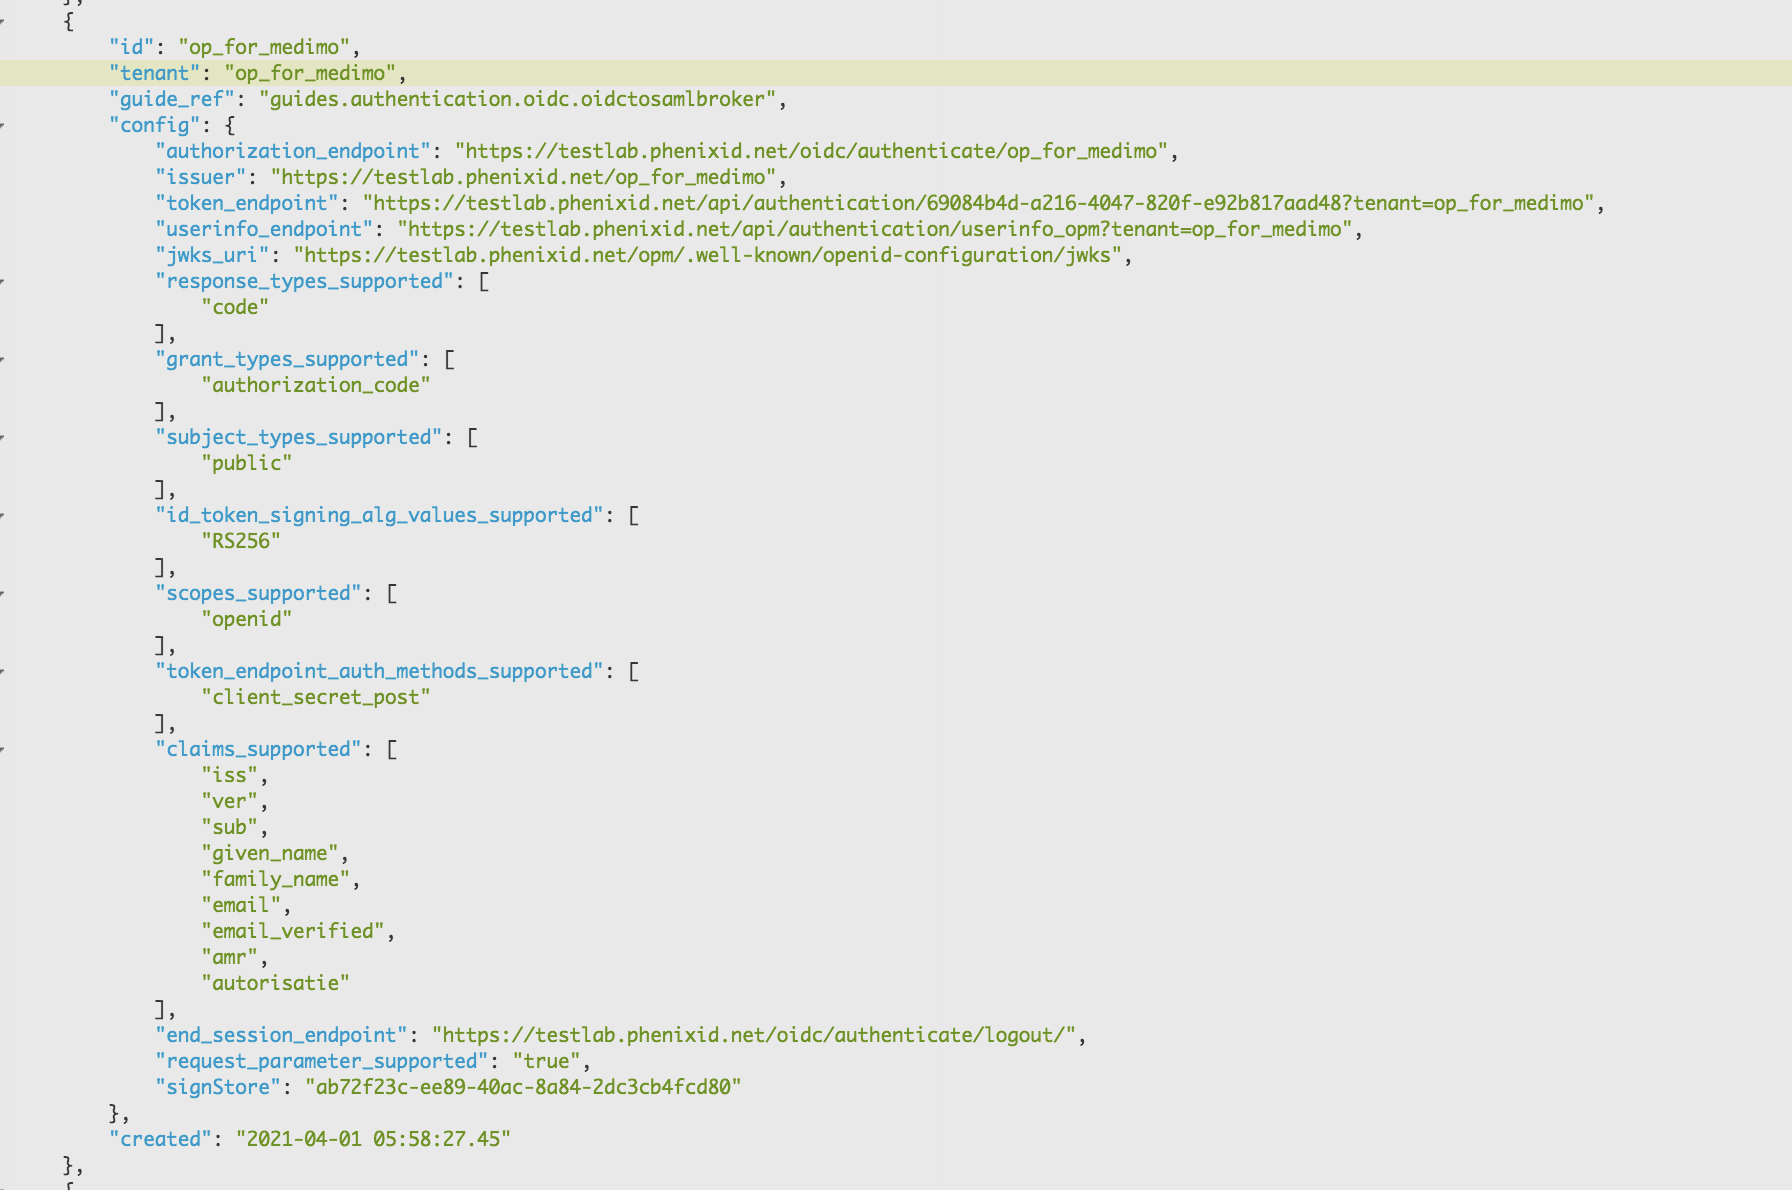
Add a userinfo_endpoint param.
"userinfo_endpoint": "https://<your_phenixid_server_domain>/api/authentication/userinfo_opm?tenant=<the tenant id>",Add values to the claims_supported array:
"email",
"email_verified",
"amr",
"autorisatie"
Example:
Click Stage changes and commit changes
Click Scenarios->OIDC-><Your OP>
Click View OP Discovery
Copy the OP discovery URL and send it, together with client_id and client_secret, to the Medimo administrator
Configure Medimo
- The Medimo administrator will handle this part.
Test
The Medimo administrator will supply instructions on how to test the setup.