Redhat Openshift MFA and SSO with PhenixID Authentication Services
Warning
Please note, this document is using the legacy authenticators - in order to use the new protocol agnostic authenticators, you need to apply relevant modifications to the configuration examples outlined in this article.
Summary
This document will guide you through the steps to enable multi-factor authentication and Single-Sign On for the open source container application platform Openshift (https://www.openshift.com) using OpenID Connect.
System Requirements
- PhenixID Authentication Server 4.0 or higher
- Openshift administration rights
Instruction
Overview
This document will guide you through the steps to enable multi-factor authentication and Single-Sign on for Red Hat Openshift.
PhenixID Authentication Services acting as OpenID Connect Provider
Login to Configuration Manager.
Scenarios->OIDC
Add a new relying party:
- client_id =
openshift - client_password =
<create a password and set> - Allowed redirect uri:s =
<ask the OpenShift admin which value to use>
- client_id =
Create a new OpenID Connect provider by selecting the desired authentication method. Follow the scenario guidelines for values.
Use the Authorization Code Flow.
Allow openshift as an allowed RP to use the OP.
Once done, click Execution flow
Expand token endpoint
Expand GenerateJwtTokenVavle
On the token attributes part, add a new name-value pair:
- name =
name - value =
{{session.givenName}} {{session.sn}}

- name =
Save changes.
Click Add valve
Select PropertyAddValve
Enter name =
token_typeand value =Bearer. Make sure the valve is placed last in the execution flow.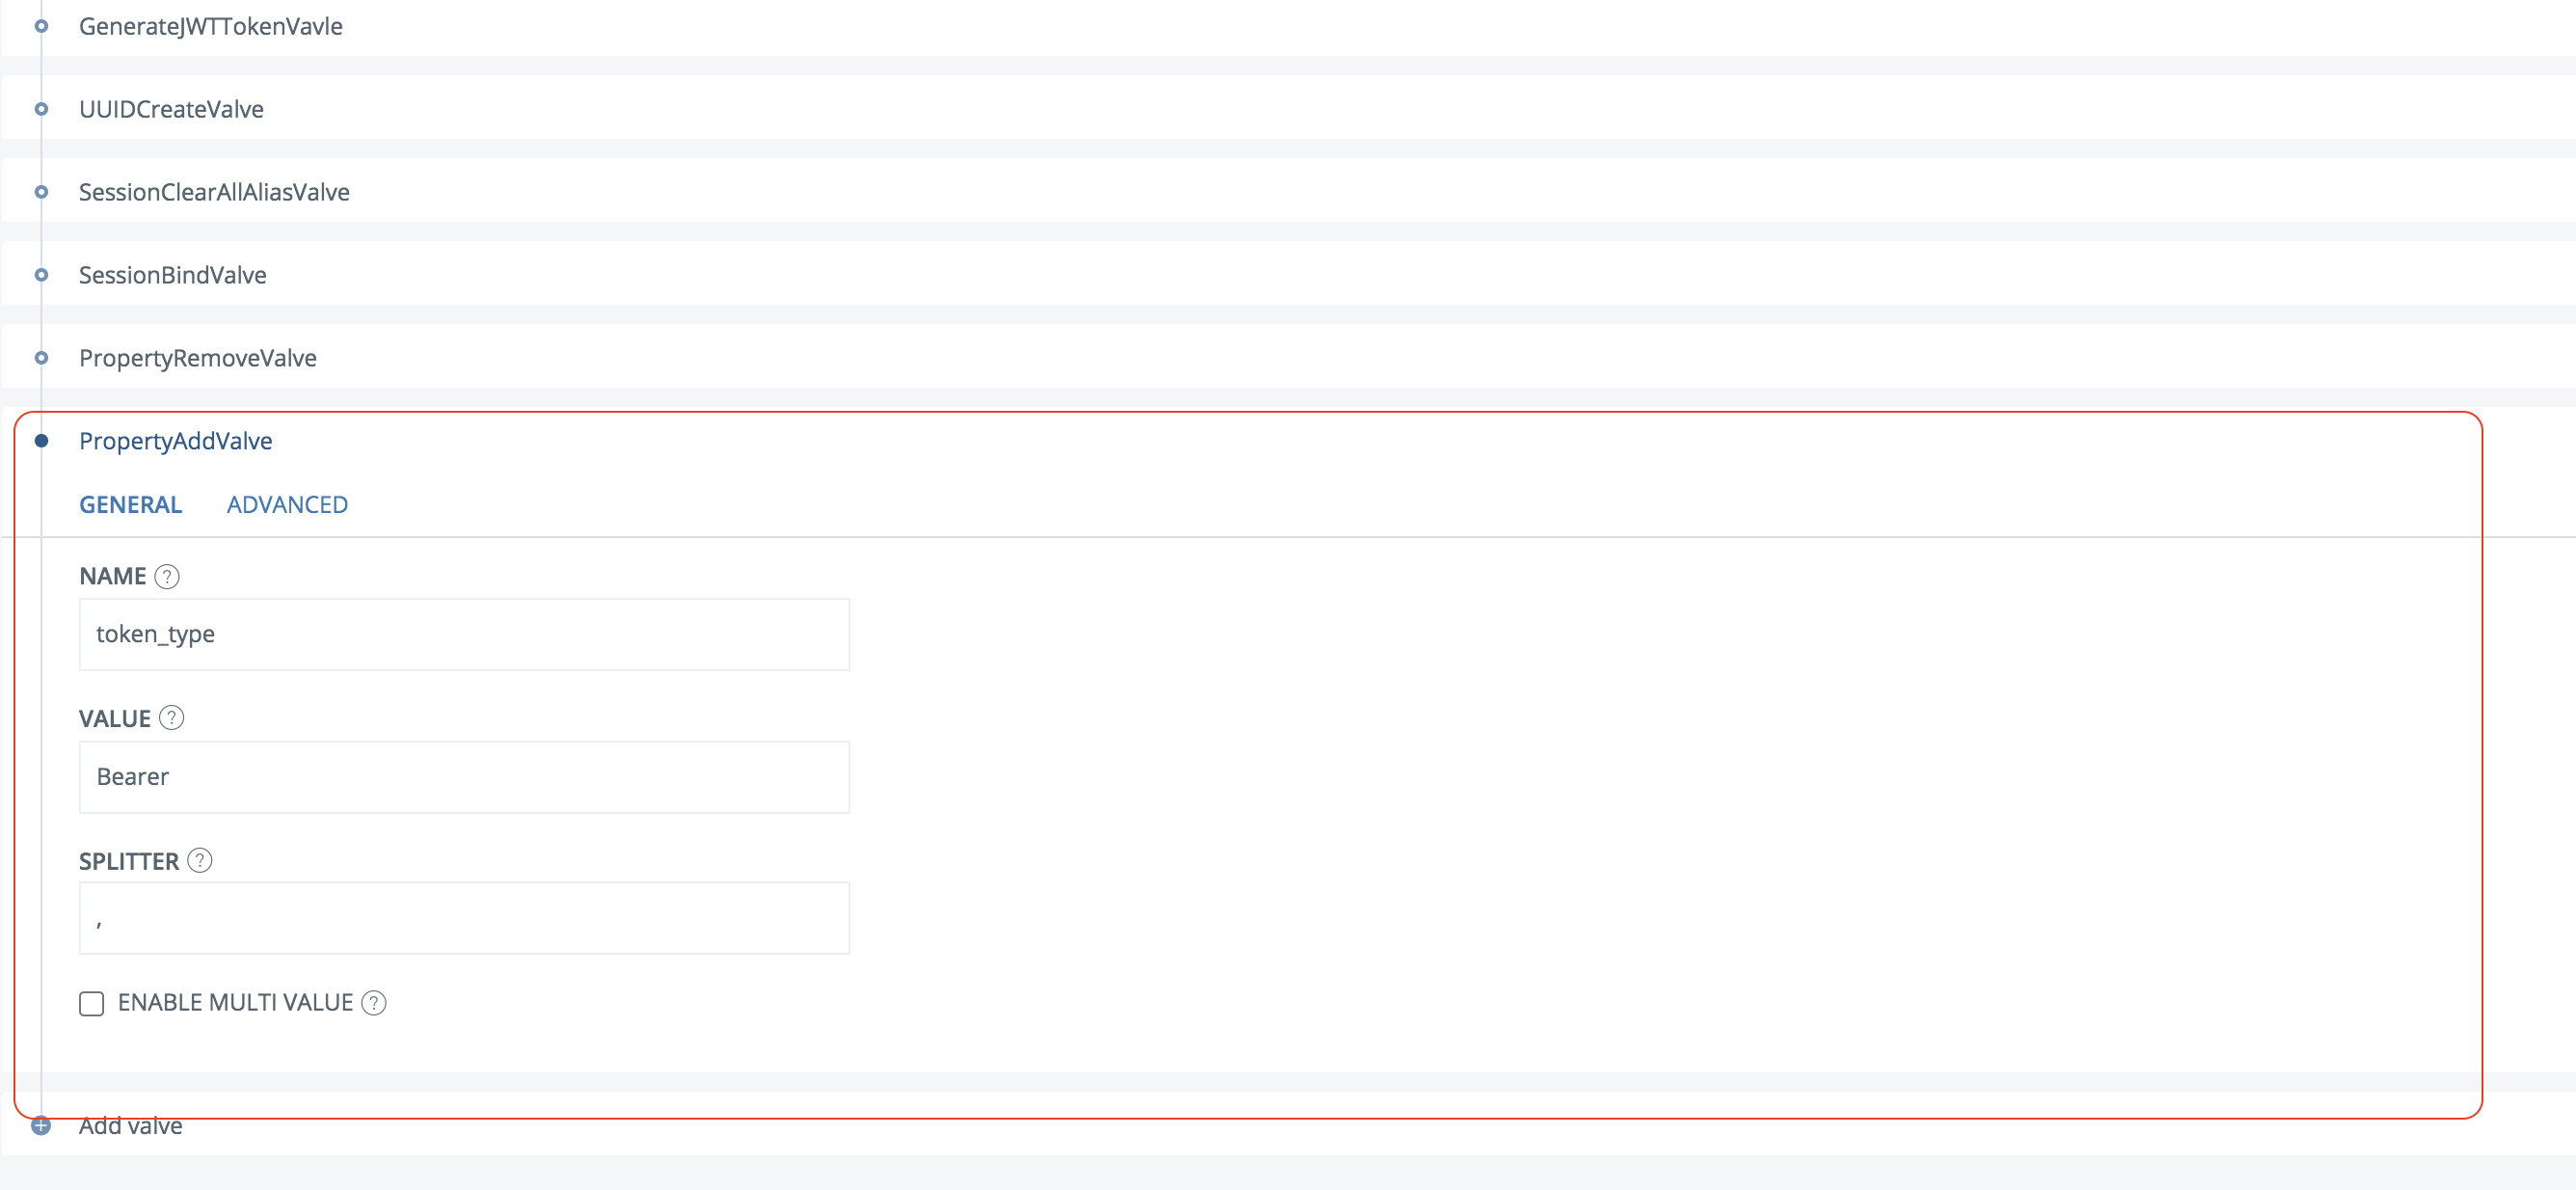
Save the changes
Click on the OpenID Connect Provider and then General
Click View OP Discovery
Copy the OP discovery URL and send it, together with client_id and client_secret, to the OpenShift administrator
Configure OpenShift
Login, as an administrator, to OpenShift
Follow this guide to add a new authentication provider: https://docs.openshift.com/container-platform/4.16/authentication/identity_providers/configuring-oidc-identity-provider.html
Set these values for the new provider:
identityProviders:
– mappingMethod: claim
  name: PhenixID
  openID:
    claims:
      email:
      – email
      name:
      – name
      preferredUsername:
      – sub
    clientID: openshift
    clientSecret:
      name: openid-secret
    issuer: 'REPLACE_WITH_THE_OP_ISSUER_VALUE'
    type: OpenID
Replace REPLACE_WITH_THE_OP_ISSUER_VALUE with the correct issuer value which can be found at the OIDC OP Discovery. Set clientID and clientSecret to the values distributed from the PhenixID Authentication Services administrator.
Save the config. Restart if needed.
Test
- Browse to OpenShift
- Click on PhenixID for authentication
- Your browser should be redirected to PhenixID Authentication Services for authentication.
- Authenticate
- You should now be redirected back to OpenShift.
- You should now be logged in to OpenShift.