SiteVision MFA and SSO with PhenixID Authentication Services
Warning
Please note, this document is using the legacy authenticators - in order to use the new protocol agnostic authenticators, you need to apply relevant modifications to the configuration examples outlined in this article.
Summary
This document will guide you through the steps to enable multi-factor authentication and Single-Sign On for the CMS platform SiteVision (https://www.sitevision.se/in-english.html) using SAML2.
System Requirements
- PhenixID Authentication Server 2.8 or higher
- SiteVision administration rights
- The users to be federated must be present in SiteVision. Use PhenixID Identity Provisiong to provision user accounts to SiteVision: PSD1148 - SiteVision actions for Identity Provisioning
Instruction
Overview
This document will guide you through the steps to enable multi-factor authentication and Single-Sign on for SiteVision .
PhenixID Server acting as SAML IdP
Setup PhenixID Authentication Services as a SAML IdP.
Fetch the SiteVision userID value from the user store or from the data produced by the authentication (such as a certificate attribute) (depending on your use case).
Use the userID as Name ID attribute.
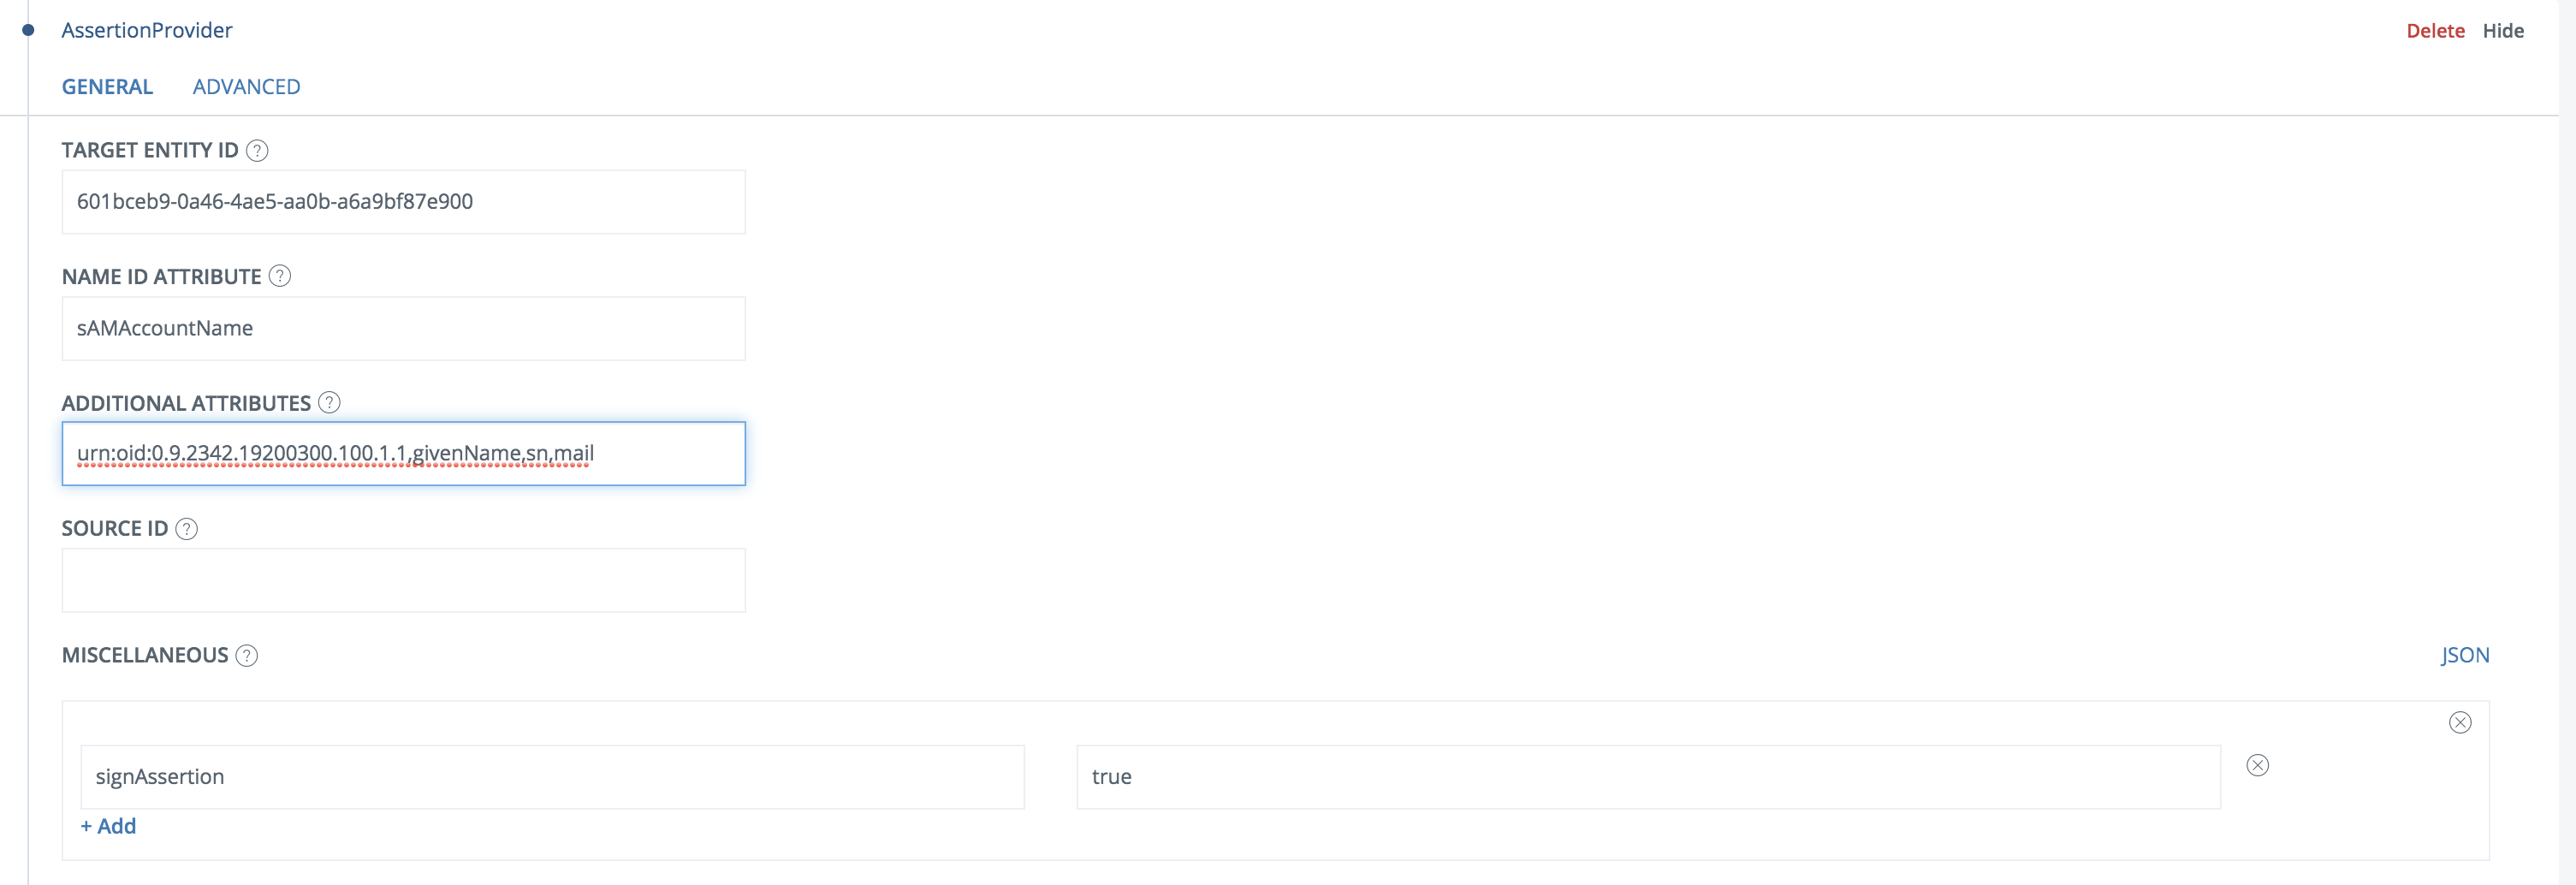
Add these attributes as additional attribute:
urn:oid:0.9.2342.19200300.100.1.1,givenName,sn,mailAdd a valve to the execution flow that contains the AssertionProvider. Place it before the AssertionProvider.
Example:

Change the value to match your configuration.
Expand the AssertionProvider.
Add a Misc param,
signAssertion=true.Example:
Go to Scenarios->Federation-> <newly_added_scenario> -> Identity Provider. Deselect “Require signed requests”. Save.
[OPTIONAL] To control SiteVision permissions on the IdP, you can add a Groups attribute to the SAML assertion. Read more about virtual groups in Sitevision here: https://help.sitevision.se/12701414.html
Configure SiteVision
Configure SiteVision SAML settings by following the guide at https://help.sitevision.se/12709836.html.
For the IDP info, point to the IDP Metadata link at
https://<YourServerDomainName>/saml/authenticate/<authenticator_alias>?getIDPMetaOR
Select “as text”, then insert the idp meta xml.
Browse to
<SiteVision_domain>/saml/metadatato fetch the SAML Service Provider metadataSave the Service Provider metadata as a file, sitevisionsp.xml.
Add trust to SiteVision on PhenixID Authentication Services
- Login to configuration manager
- Open Scenarios->Federation->SAML Metadata upload
- Click the plus sign
- Add SiteVision SAML SP Metadata by uploading the file downloaded in previous step (sitevisionsp.xml)
Test
- Browse to your SiteVision site
- This should result in a redirect to PhenixID Authentication Server
- Authenticate
- If authentication was successful, a redirect to SiteVision should occur (with SAML assertion)
- The user should now be logged in.
Troubleshooting
- If error message is presented on PhenixID Authentication Services page, please check server.log for details.
- If error message is presented on SiteVision, please consult SiteVision logs for details.