WordPress MFA and SSO with PhenixID Authentication Services
Warning
Please note, this document is using the legacy authenticators - in order to use the new protocol agnostic authenticators, you need to apply relevant modifications to the configuration examples outlined in this article.
Summary
This document will guide you through the steps to enable multi-factor authentication and SSO for the CMS system WordPress ( https://wordpress.com/)
System Requirements
- PhenixID Authentication Server 3.0 or higher
- WordPress instance administrative rights
Overview
This step-by-step-guide is based on the MiniOrange SSO SAML SP Plugin for WordPress. The plugin supports IdP-initiated SAML out-of-the box. For SP-initiated SAML, the premium version is required.
Instruction
Configure PhenixID Authentication Services as Identity Provider
Setup PhenixID Authentication Services as a SAML IdP.
Go to Scenarios->Federation-><YOUR_IDP>->Identity Provider
Add a Post SLO url:
https://<your_phenixid_domain>/saml/authenticate/logoutGo to Scenarios->Federation-><YOUR_IDP>->Execution Flow
Make sure these attributes (they may be named differently based on your user store environment) are fetched from the user store:
- givenName
- sn
(Also, if you plan to control the WordPress user role from the Identity Provider, fetch the appropriate data, such as group membership, to be able to configure appropriate role value).
If your attributes are named differently than above, add PropertyAddValve(s) to populate values according to the names above.Example:
- PropertyAddValve
- name=
givenName - value=
{{item.firstName}}
Make the following adjustments to the execution flow.
- Click AssertionProvider
Set NameID Attribute = mail
Set additional attributes = mail,givenName,sn,role
Example:
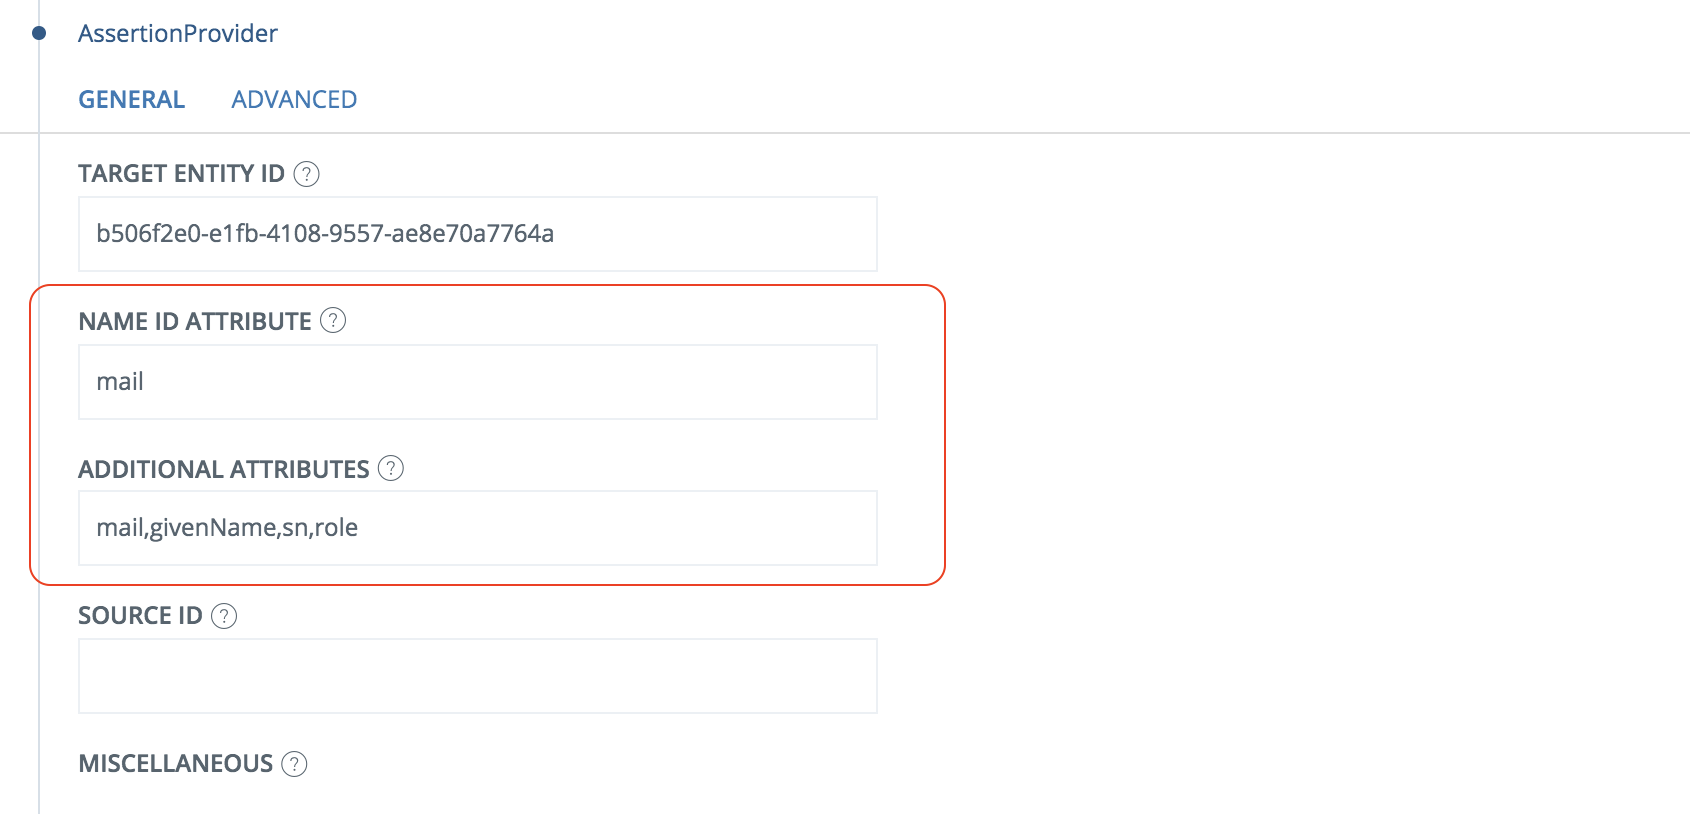
- Save
- Click AssertionProvider
Go to Scenarios->Federation-> <newly_added_scenario> -> Identity Provider. Deselect “Require signed requests”.
Save.
Go to Scenarios->Federation-> <newly_added_scenario> -> Identity Provider
Click View SAML Metadata
Download the displayed SAML IdP metadata to a xml file.
Configure WordPress
Follow this guide. Use the following options:
Step 1 – use the B option to download the SP metadata file. Name the file sp.xml.
Step 2 Use the A option and upload the IdP metadata file downloaded in previous step.
- Set Identity Provider Name = Organization IdP. Change Organization to your organization name
Step 3 – Attribute mapping. Use these values:
- Username = mail
- Email = mail
- First Name = givenName
- Last Name = sn
- Group/role = role [OPTIONAL]
Step 4 – Role mappning [OPTIONAL]
Follow the instructions.
Step 5 – SSO settings. Enable if possible (only if Premium). Follow the instructions.
Add WordPress as trusted Service Provider in PhenixID Authentication Services
- Login to configuration manager
- Scenarios->Federation
- SAML Metadata upload
- Upload the file sp.xml.
Add configuration for IdP-initiated SAML on PhenixID Authentication Services
Open sp.xml in a text editor
Copy the entityID value
Login to configuration manager
Scenarios->Federation->Your IdP
Execution Flow
Expand AssertionProvider
Add the copied entityID value to the Source ID field.
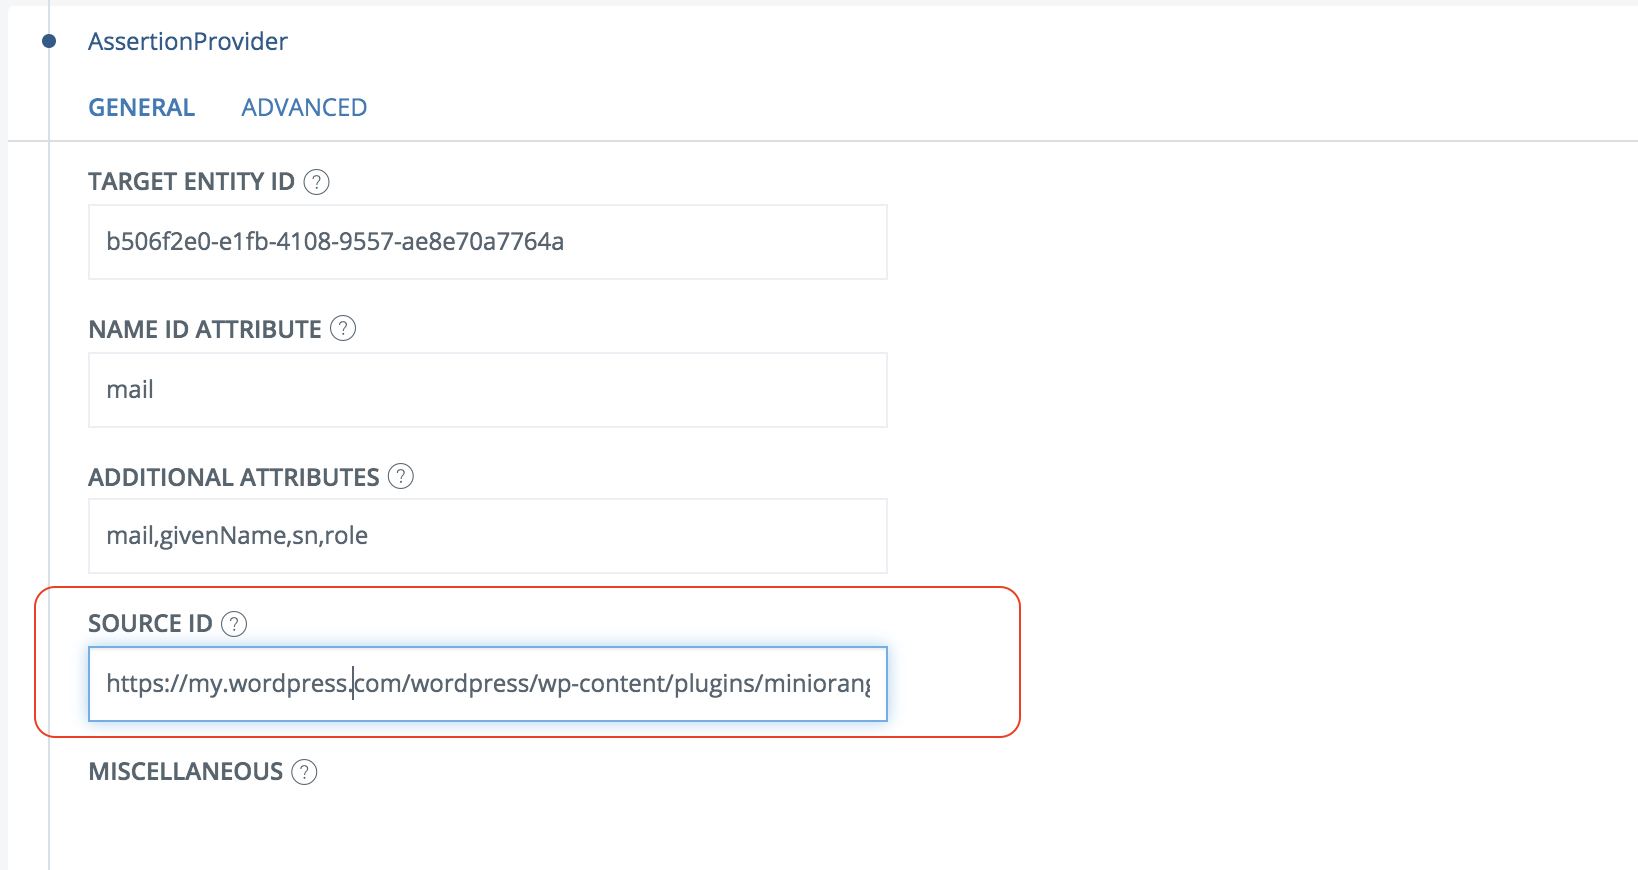
Save
Test
IdP-initiated
- Browse to the IdP SSOService-location URL (found in the IdP metadata)
- Authenticate
- You should now be redirected to WordPress and be logged in (with the correct role if the IdP controls the role)
SP-initiated
(Only with the premium version of the Miniorange SSO plugin)
- Browse to your WordPress URL
- Select to login with the IdP
- Authenticate
- You should now be redirected to WordPress and be logged in (with the correct role if the IdP controls the role)