Protecting web-based resource with HTTP Reverse proxy and MFA/SSO using PhenixID Authentication Services
Summary
This document will guide you through the steps to enable multi-factor authentication and Single-Sign On for any web-based resource, using PhenixID Authentication Services in combination with Nginx as HTTP reverse proxy.
Overview
Architecture
Components

The solution involves several components:
Nginx (external open source software)
Provides http proxy functionality
PhenixID Nginx plugin
Scripts and config needed to provide acccess control and sso
PhenixID Authentication Services
Provider of the app portal (Myapps) and the sign-in method(s). Controls the end user authenticated session.
Proxied resource. The target resource, sitting behind the proxy. The target resource can reside on the same server or on an external server.
Sequence flow

End user points browser to PhenixID Authentication Services (PAS) MyApps application (myapps).
The http requests from the browser to PAS passes through Nginx HTTP reverse proxy.
PhenixID Authentication Services request user authentication.
The user authenticates (please note that depending on the sign-in method, this might include multiple requests from the browser to PhenixID Authentication Services. This can also be a federated (external) sign-in).
The http requests from the browser to PAS passes through Nginx HTTP reverse proxy.
The PAS Myapps portal generates link(s) to the proxied resources. These links are dynamic for security reasons. (Using the pattern
/myapps/sso/x-y-w-z)The user clicks on the proxied resource link.
Nginx PhenixID plugin performs backend callback to verify user access to requested resource (=is the session authenticated?)
If authenticated -> 8.
Browser displays the proxied resource through the dynamic link (
/myapps/sso/x-y-w-z).
System Requirements
- Linux server with 2 CPUs and =>8GB RAM
- Internet access from the server (at least during the installation / setup)
- PhenixID Authentication Services installation media (4.0.2 or higher)
- The web resource(s) to be proxied must use relative paths.
Using absolute paths, proxy rewrite rules must be written and deployed to the Nginx proxy. Please consult the Nginx online documentation for additional assistance.
Instruction
Overview
This document will guide you through the steps to enable multi-factor authentication and Single-Sign on for a web resource protected by a HTTP Reverse Proxy, using PhenixID Authentication Services in combination with Nginx.
The installation instruction below is based on a Linux Ubuntu OS where PAS and Nginx are installed on the same machine.
Please adjust your configuration if you run another Linux distribution and/or run the components on different machines.
PhenixID Authentication Services
Installation
Install PhenixID Authentication Services in
/opt/phenixid/server/using these commands:sudo apt update sudo apt install fonts-dejavu fontconfig chmod +x phxid_server_linux_x64_4_0_2.sh sudo ./phxid_server_linux_x64_4_0_2.sh 2See the article Extra VM options for information about setting additonal VM options.
Set the
com.phenixidentity.operatingPlattformparameter to appliance:-Dcom.phenixidentity.operatingPlattform=appliance
Save the file
Start the server
Configuration
Setup the sign-in method(s)
Authentication to MyApps is based on federation (SAML).
- Login to Configuration Manager.
- Setup PhenixID Authentication Services as a SAML IdP.
- If the sign-in methods are hosted on an external SAML Identity Provider, import the SAML Identity Provider metadata to establish trust
Setup MyApps
- Login to Configuration Manager.
- Use Scenarios->Applications->Myapps to configure MyApps.
- Select which IdP MyApps should use for authentication.
- (If the sign-in methods are hosted on an external SAML Identity Provider, export the SAML Service Provider metadata for Myapps and send to SAML Identity Provider admin to establish trust).
- Go to Myapps->Application list
- Click Add valve
- Add CreateProxyApplicationValve.
- Add necessary parameters to the config.
Example: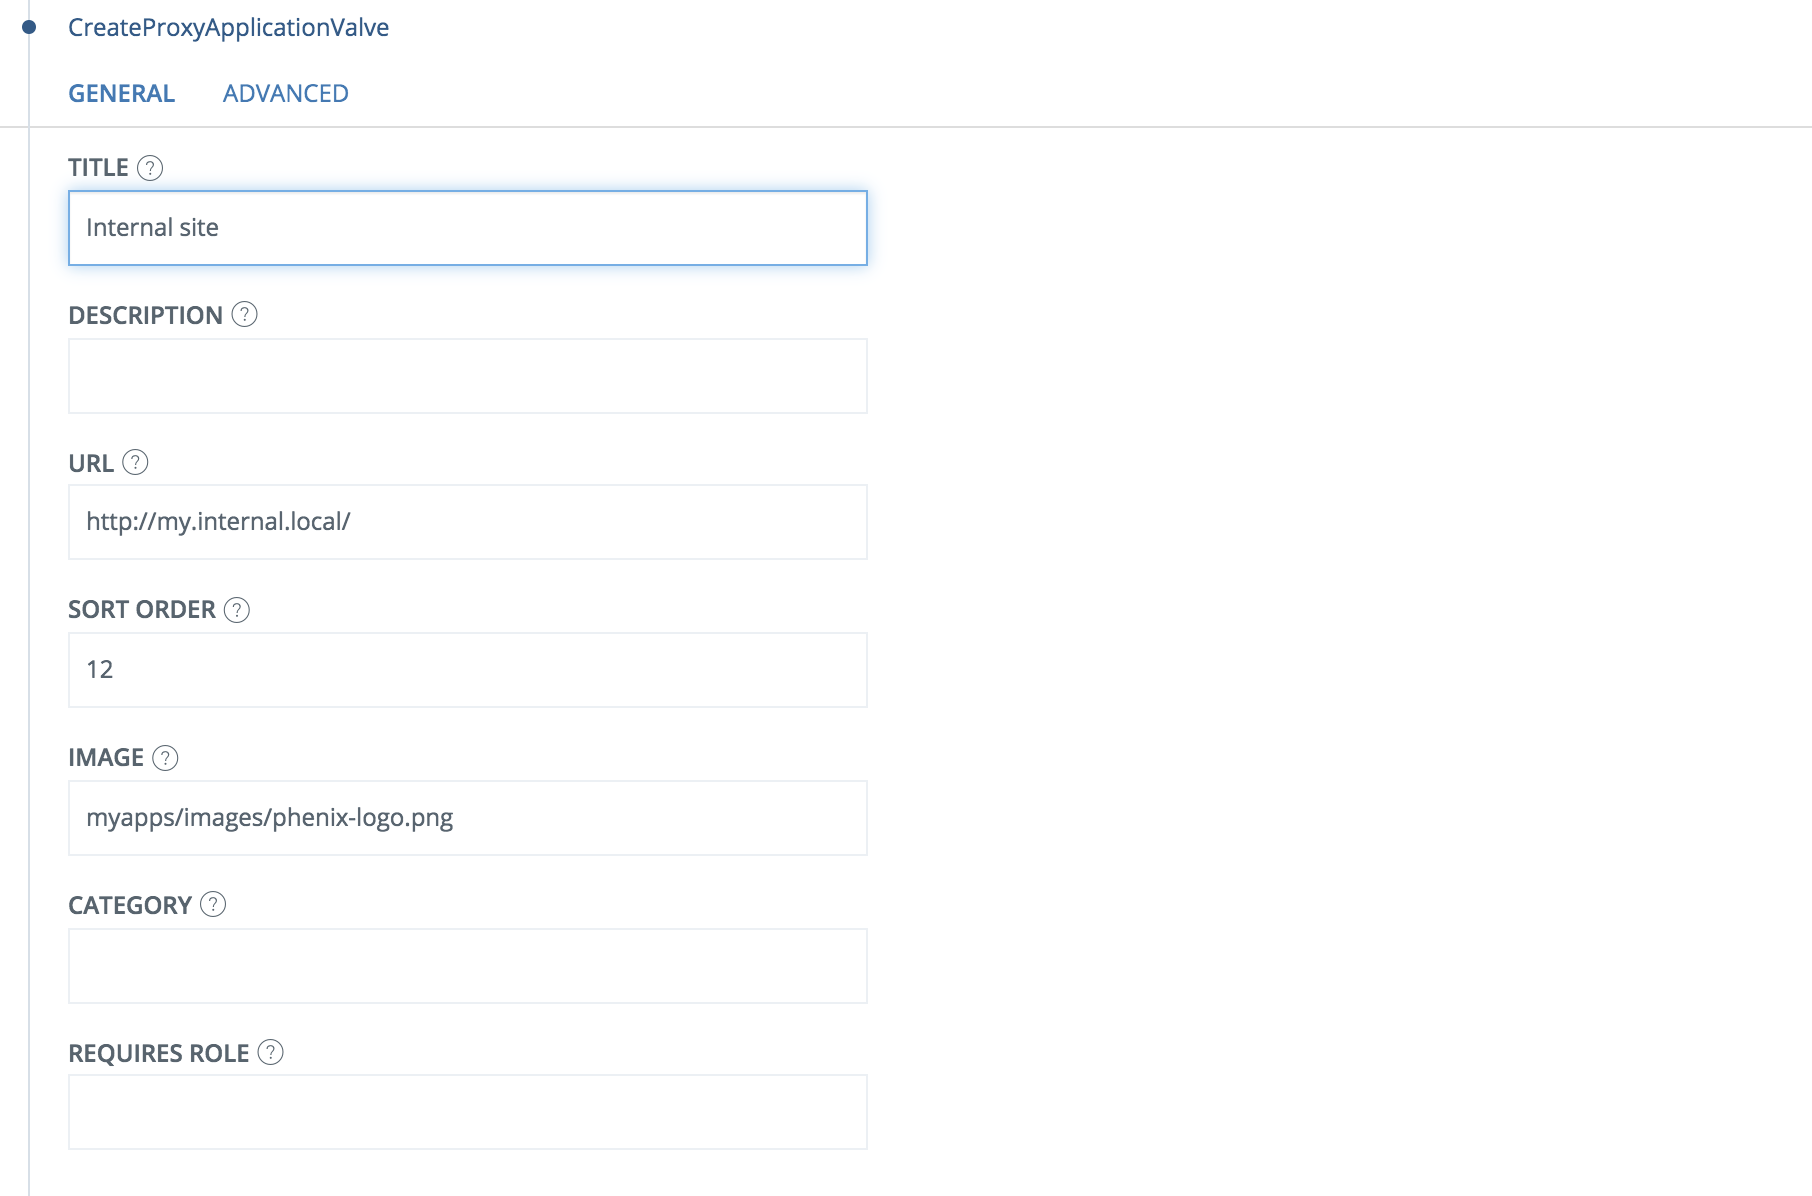
Nginx with PhenixID plugin
Installation
Connect to the server via SSH
Execute these commands to install Nginx
sudo apt install curl gnupg2 ca-certificates lsb-release
echo “deb http://nginx.org/packages/ubuntu `lsb_release -cs` nginx” | sudo tee /etc/apt/sources.list.d/nginx.list
curl -fsSL https://nginx.org/keys/nginx\_signing.key | sudo apt-key add –
sudo apt-key fingerprint ABF5BD827BD9BF62
sudo apt update
sudo apt install nginx
sudo apt-get install nginx-module-njs
Configuration
SSL
Setup SSL for https using these commands:
sudo mkdir /etc/nginx/sslopenssl req -x509 -nodes -days 730 -newkey rsa:2048 -keyout /etc/nginx/ssl/helios.key -out /etc/nginx/ssl/helios.crt -subj "/CN=myapps.phenixid.se"Change myapps.phenixid.se to your domain.
cd /etc/nginx/conf.dDownload helios.conf file from https://files.phenixid.se/f/54126
_wget https://files.phenixid.se/s/cLBWMJxnKoDT82Q/downloadmv download helios.conf
Proxy configuration
cd /etc/nginx/sudo mkdir locations.dcd locations.dDownload tar from https://files.phenixid.se/f/54125
wget https://files.phenixid.se/f/54125mv download locations.conf.tartar -xvf locations.conf.tar(If Nginx is running on another machine than PAS, modify the IP-adress value in pas.conf and sso.conf)
Modules and PhenixID plugin
cd /etc/nginx/vi /nginx.confAdd this line to the top of the file:
include /etc/nginx/modules.d/\*.conf;Save the file
mkdir modules.dcd modules.dCreate file ngx_http_js_module.conf:
vi ngx_http_js_module.confAdd this line to the file:
load_module modules/ngx_http_js_module.so;Save the file
sudo mkdir /etc/nginx/scripts
cd /etc/nginx/scripts
Download file from https://files.phenixid.se/f/54151.
wget https://files.phenixid.se/f/54151mv download sso.jsRestart nginx service.
sudo service nginx restart
Test
Browse to your PAS MyApps application
Authenticate
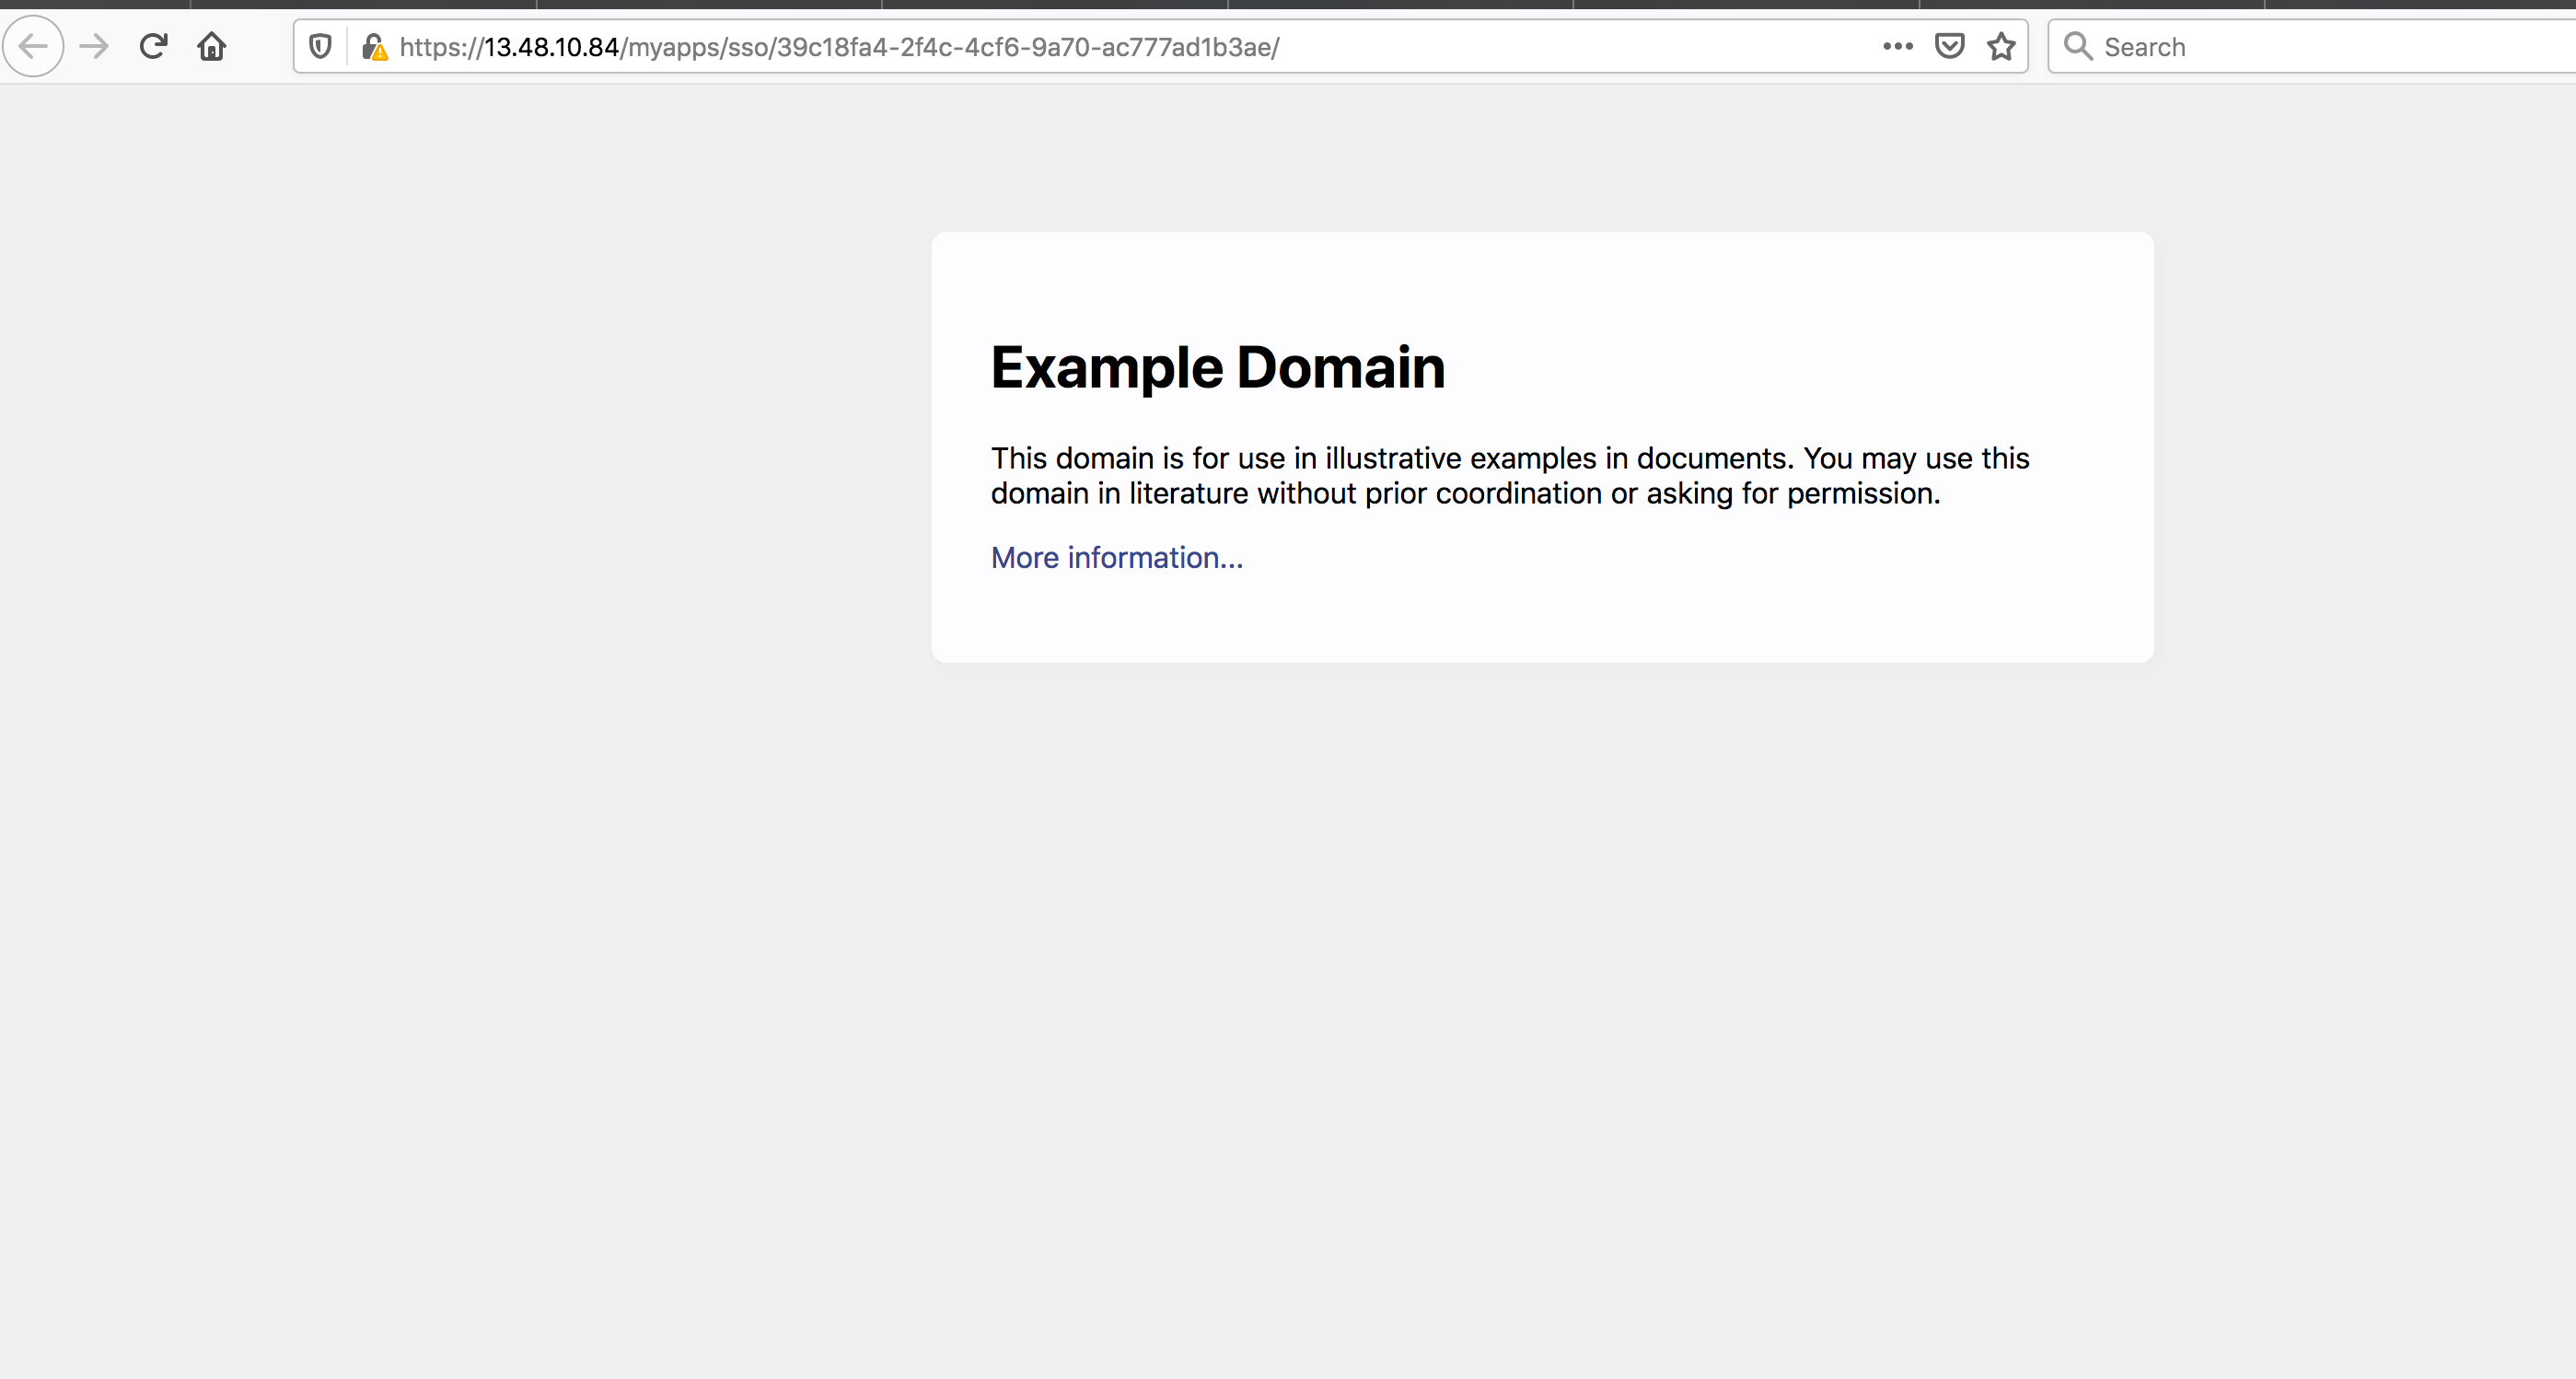
Click on the link to the proxied resource. Example:
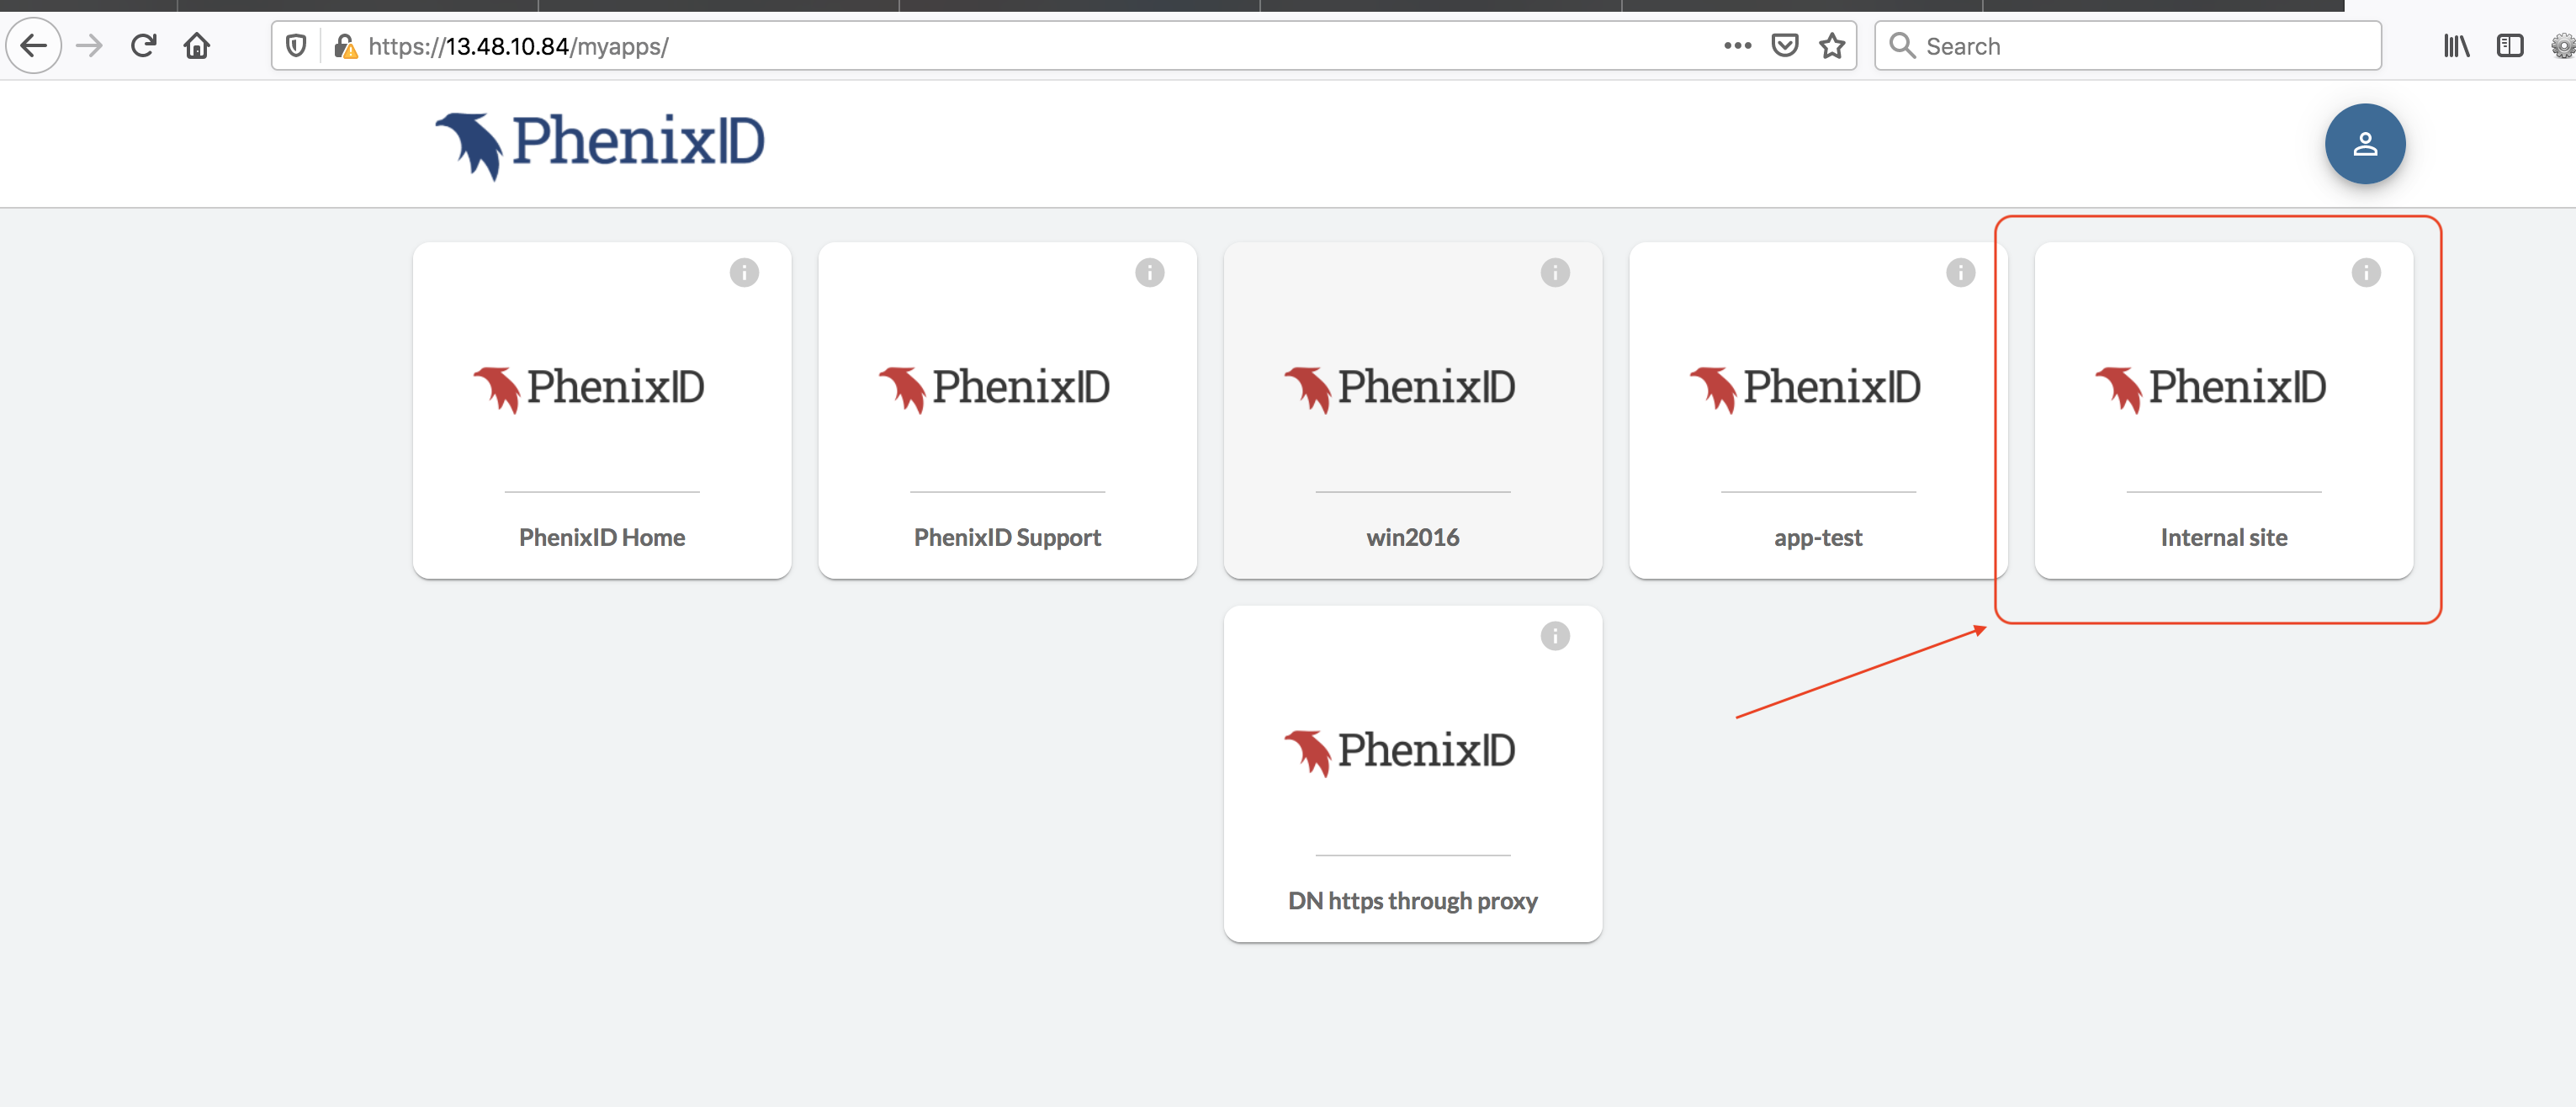
The proxied web resource should now be displayed in the browser.
Example:
Nginx – tips and tricks
- If the proxied resource is hosted on a separate machine, please make sure that the Nginx server can reach the machine on the configured port (443 for example).
- If the proxied resource is hosted on a separate machine and is targeted with a domain name (for example
http://example.org), please verify that Nginx resolves DNS names properly. If not, add a resolver parameter according to: http://nginx.org/en/docs/http/ngx_http_core_module.html#resolver
Troubleshooting
Re-testing
Make sure to logout from PAS and restart the browser before testing again.
Configuration changes
Changing Nginx configuration requires a restart of service.
No response when addressing Myapps
- Check the nginx configuration and logs (/var/logs/nginx)
- Check the PAS configuration (ports) and log (/opt/phenixid/server/logs/server.log)
Unable to login to MyApps
- Check the federation setup between MyApps and the SAML Identity Provider.
- Check the PAS log (/opt/phenixid/server/logs/server.log)
Proxied resource displays strange GUI
The web resource probably uses absolute paths for css and links. Change the html code or add rewrite rules to Nginx (https://www.nginx.com/blog/creating-nginx-rewrite-rules) for proper behavior.